Texas X Riders

Please login or register.

Login with username, password and session length
Advanced search  
Pages: [1] 2 3 ... 5

Author Topic: Painting Engine, Carb & Manifold 101  (Read 8205 times)

0 Members and 1 Guest are viewing this topic.

MRVTX

  • Texas X Rider OverLord
  • ******
  • Posts: 3111
  • Magnolia, TX
    • What I do...
Painting Engine, Carb & Manifold 101
« on: March 04, 2009, 12:15:14 PM »

I added black to my bike!!!  :o :o

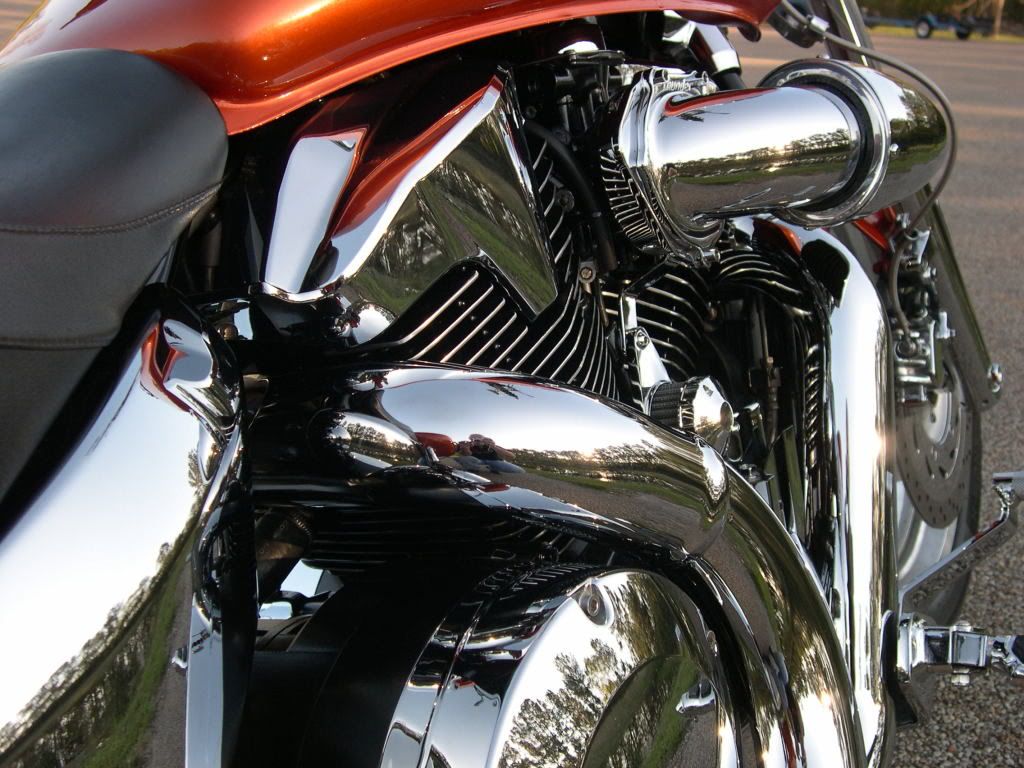
Since I have a ton of stuff off the bike right now, I decided to polish the fins and paint the engine. This is another one of those "I'm glad I did it and it was worth it, but I'll never do it again" mods.  ;D

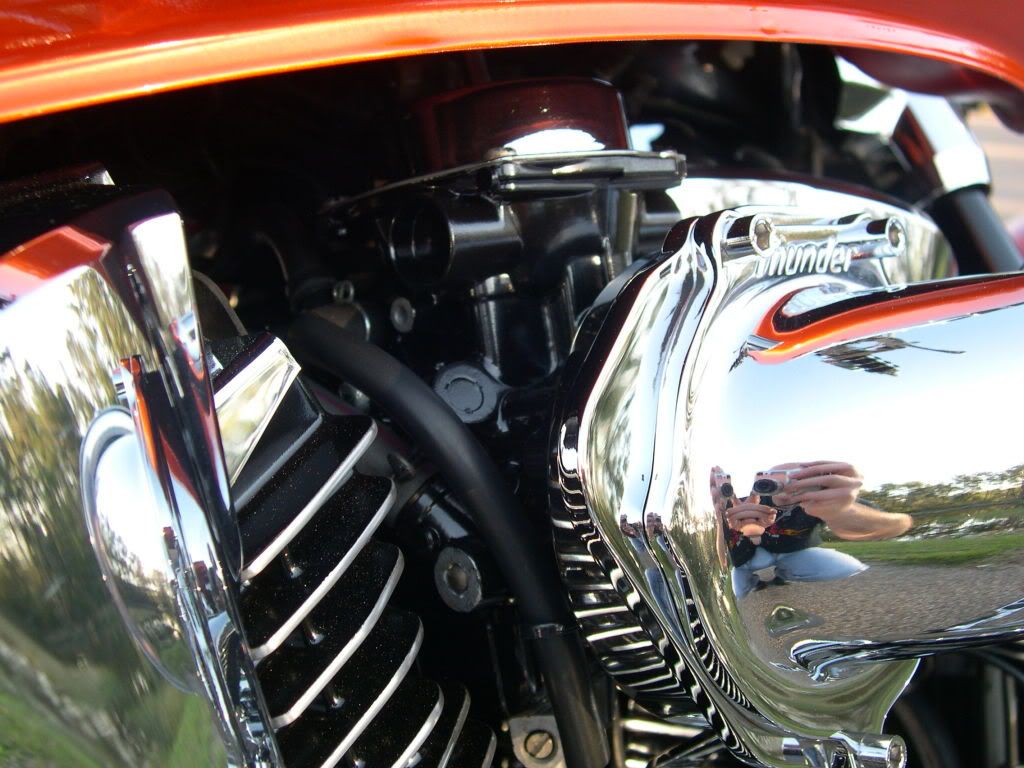
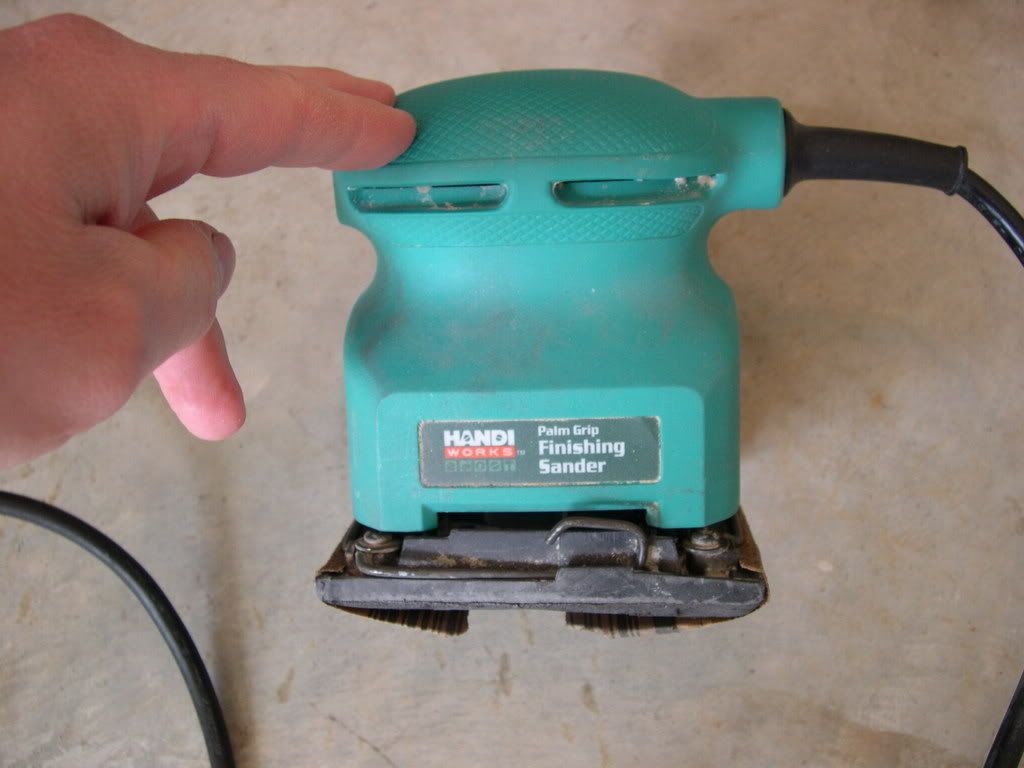
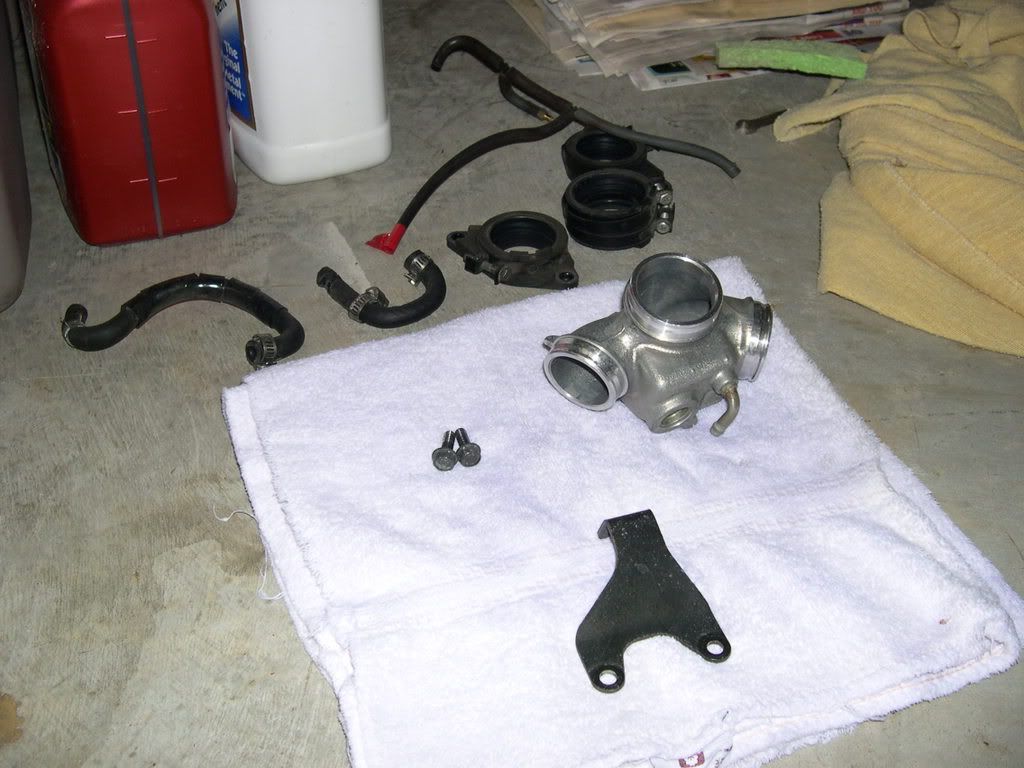
I started off by removing the tank, air intake, pipes, upper fin shrouds, clutch cable bracket, carb, manifold and anything else I could get out of the way. To file the fins down, I tried several methods to see which would get the job done the quickest with the best results. First, I tried a Craftsman file, but it was not getting it done quickly. I then got out the palm sander, put 60-grit paper on it and quickly knocked the coating off the fins.


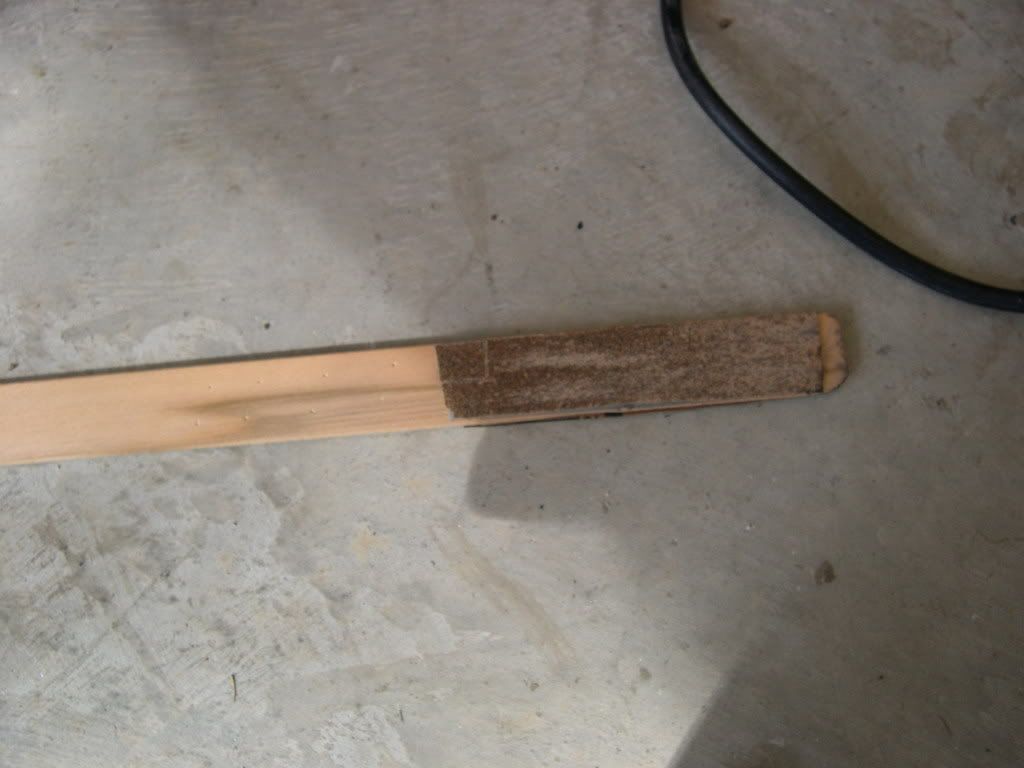
It was too big to get in between, in front of and behind the jugs, so I taped some 60-grit strips of sandpaper to paint sticks (Easy-E's idea) and got the fins sanded down pretty well. Then I just used some bigger strips and hand-sanded those same hard-to-reach areas until I was satisfied.


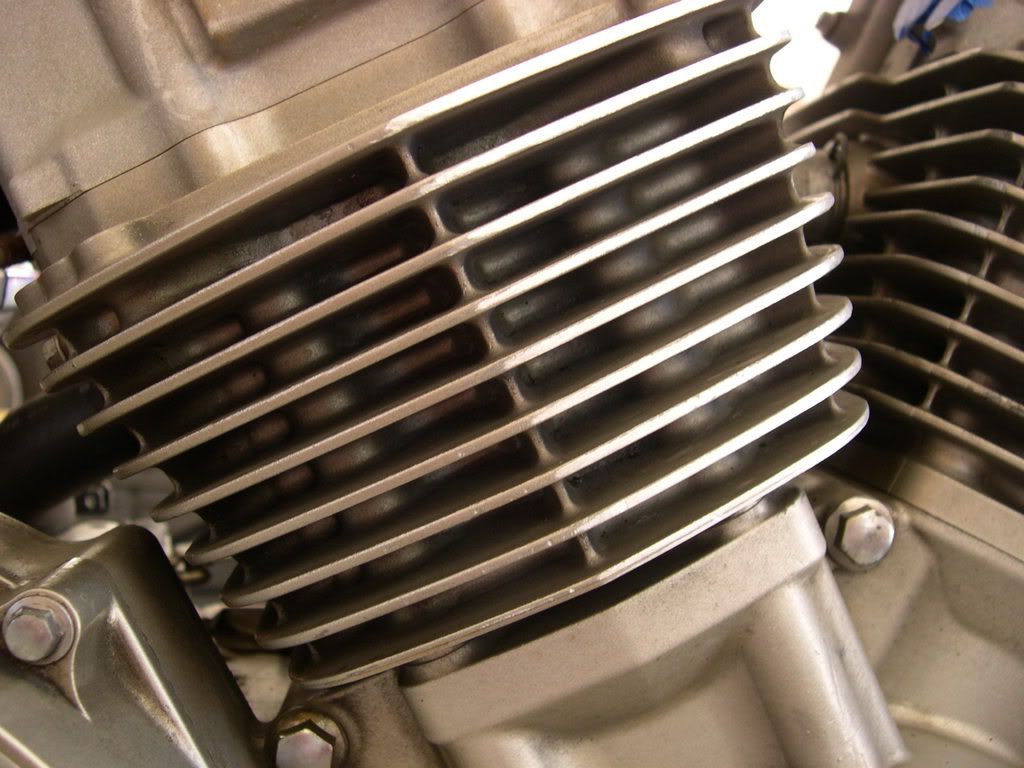
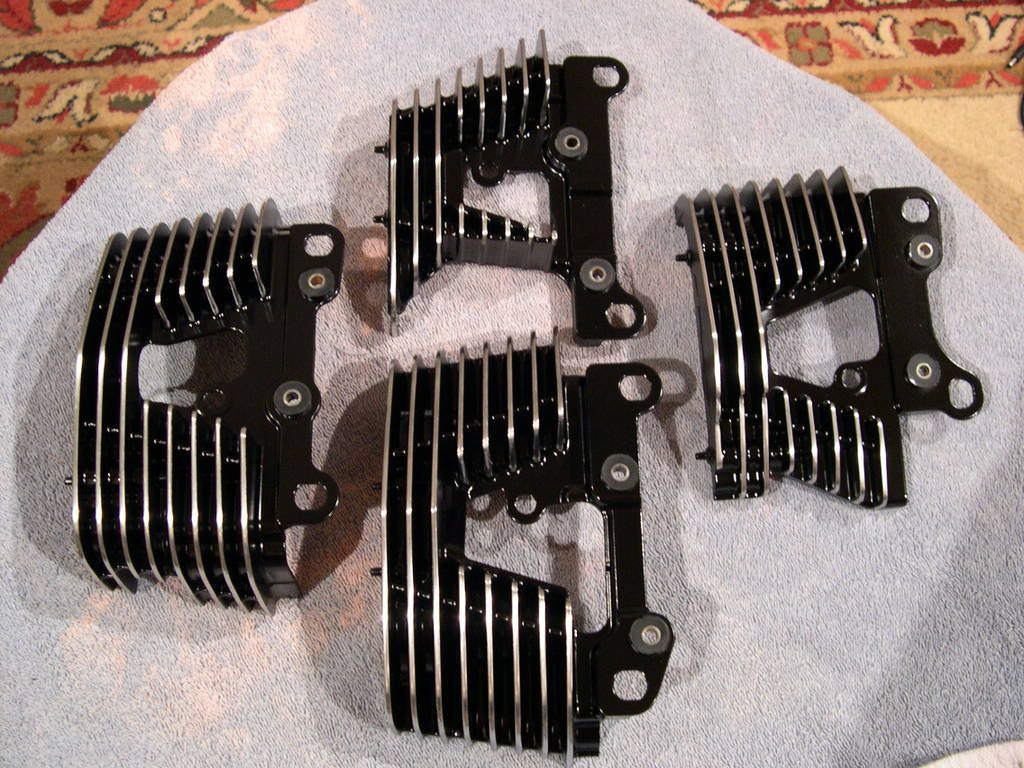
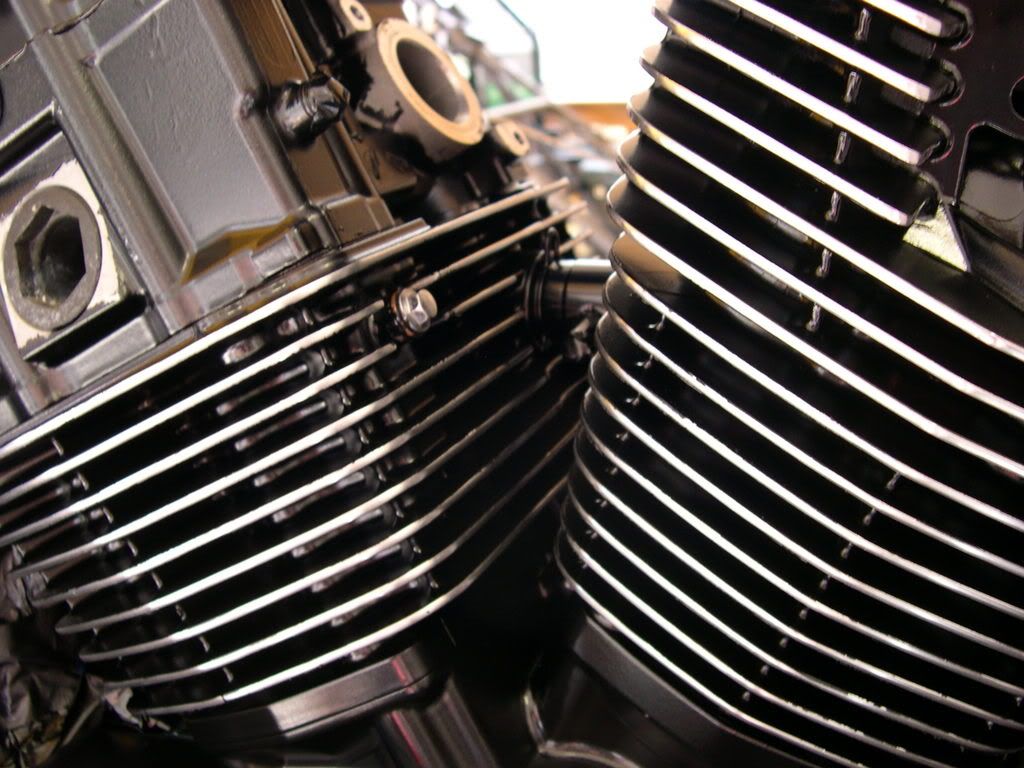
In this picture, I did the right side of the fins with the palm sander and left the left side alone, so you can see just how well it worked.


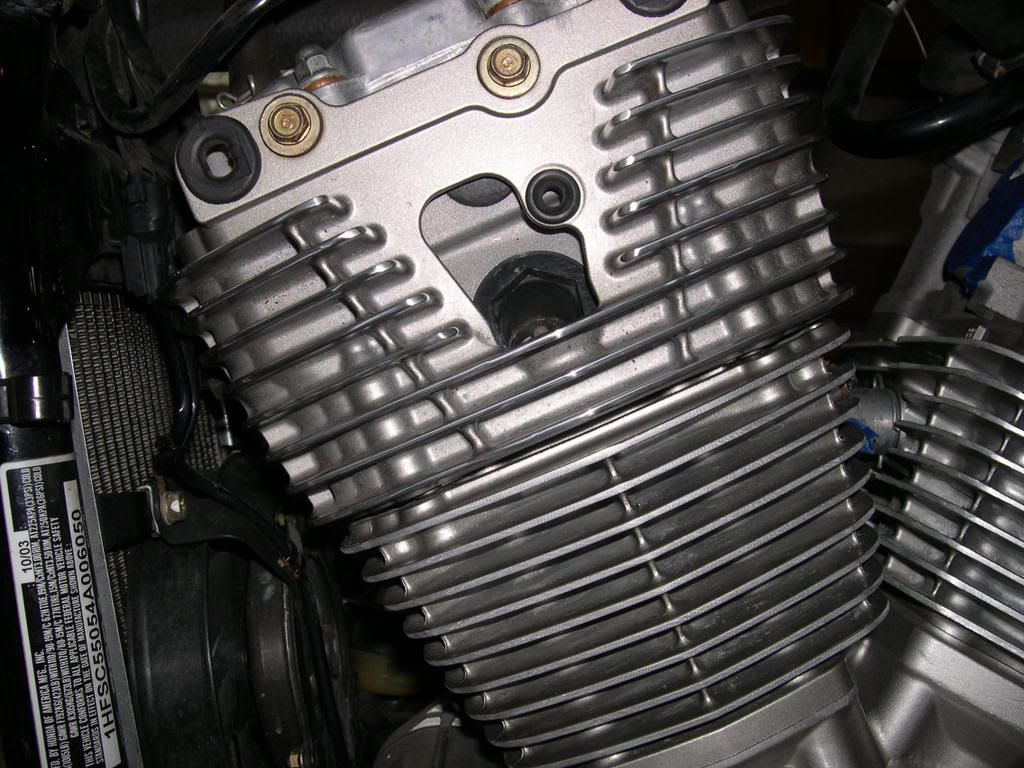
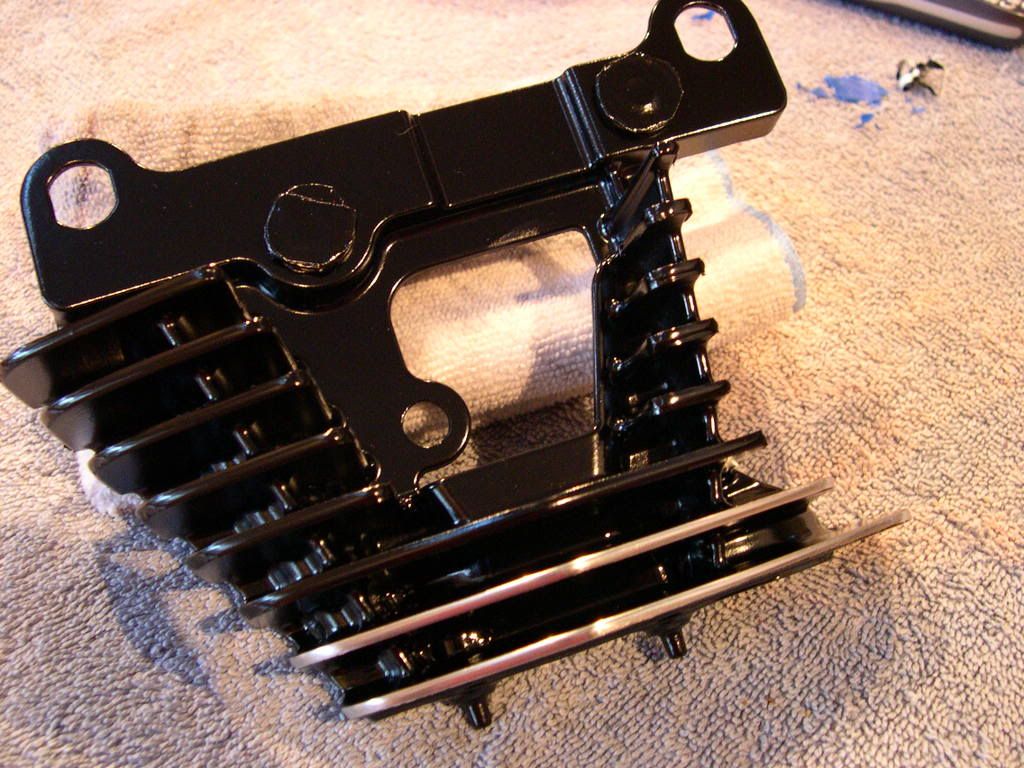
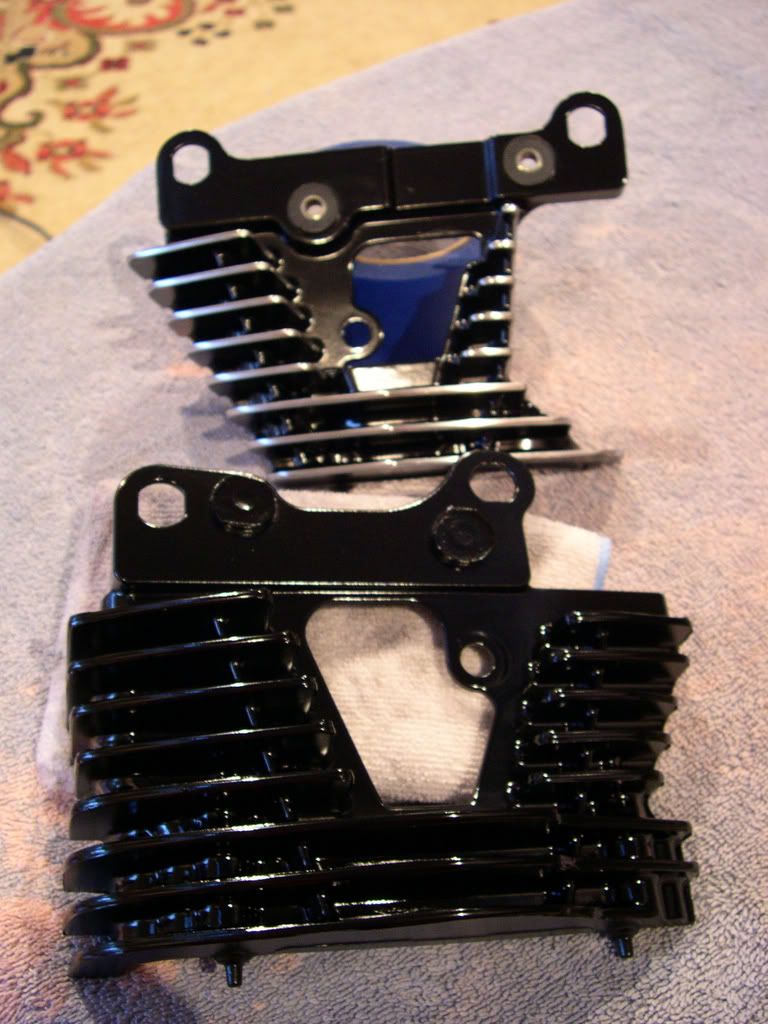
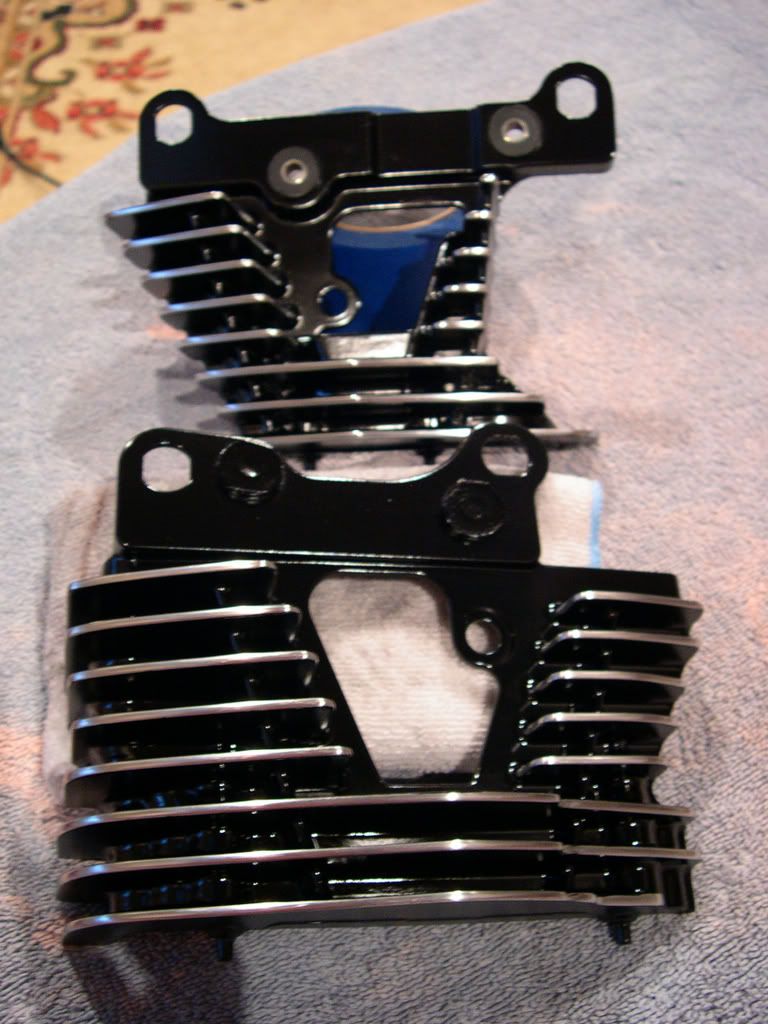
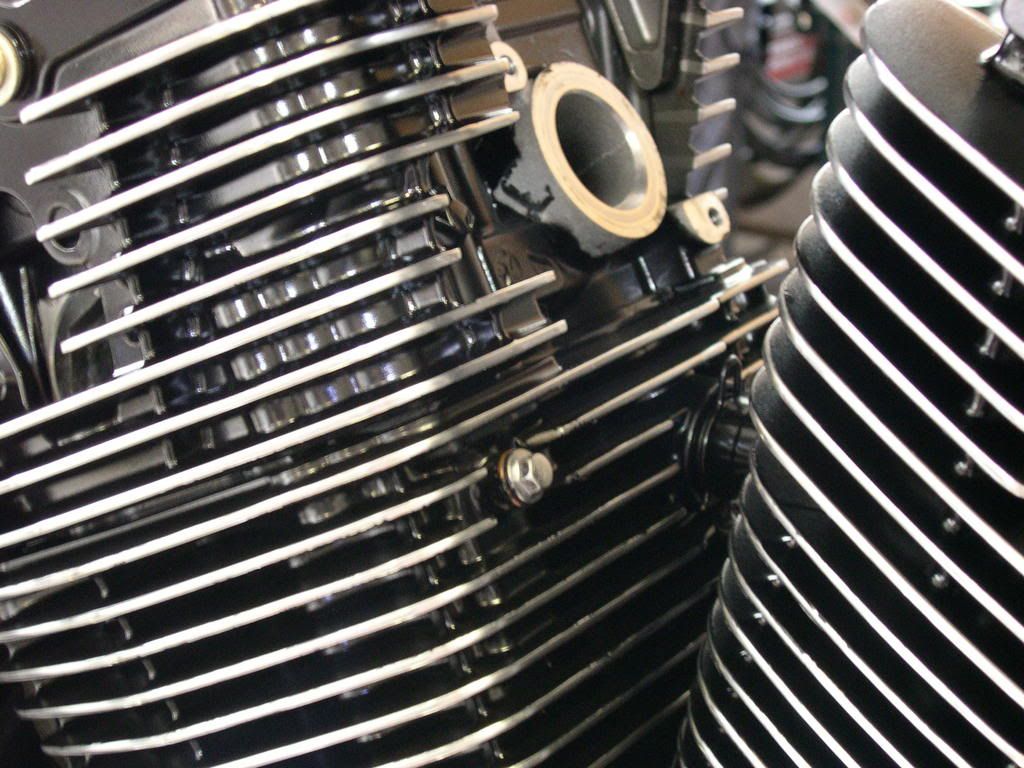
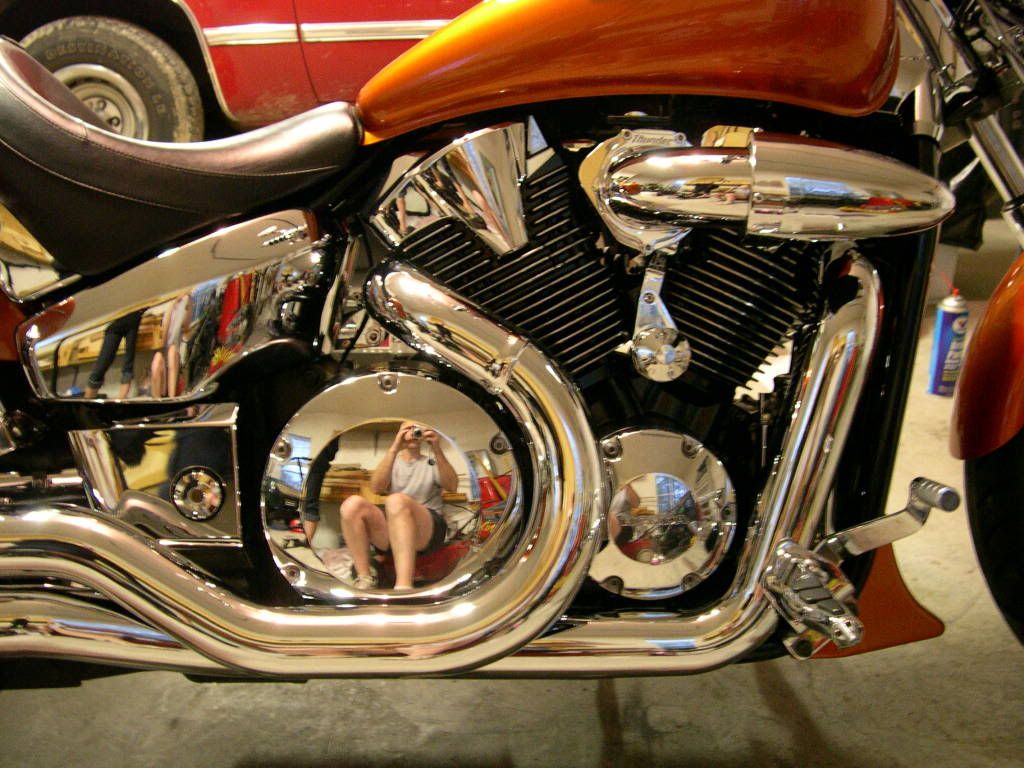
Once I got the fins sanded down really well, I started wet-sanding. This was a very tedious process, but really should be done to get the maximum results of polished fins. I went through the following grades: 220, 320, 400, 600, 800, 1000 & 1500. Once I was done wet-sanding, I got out the Dremel, some polishing pads and some polishing compound and went over each fin until I got the desired look. In this picture, I did the upper fin shroud and put it back on to give you a comparison. The bottom has not been polished.


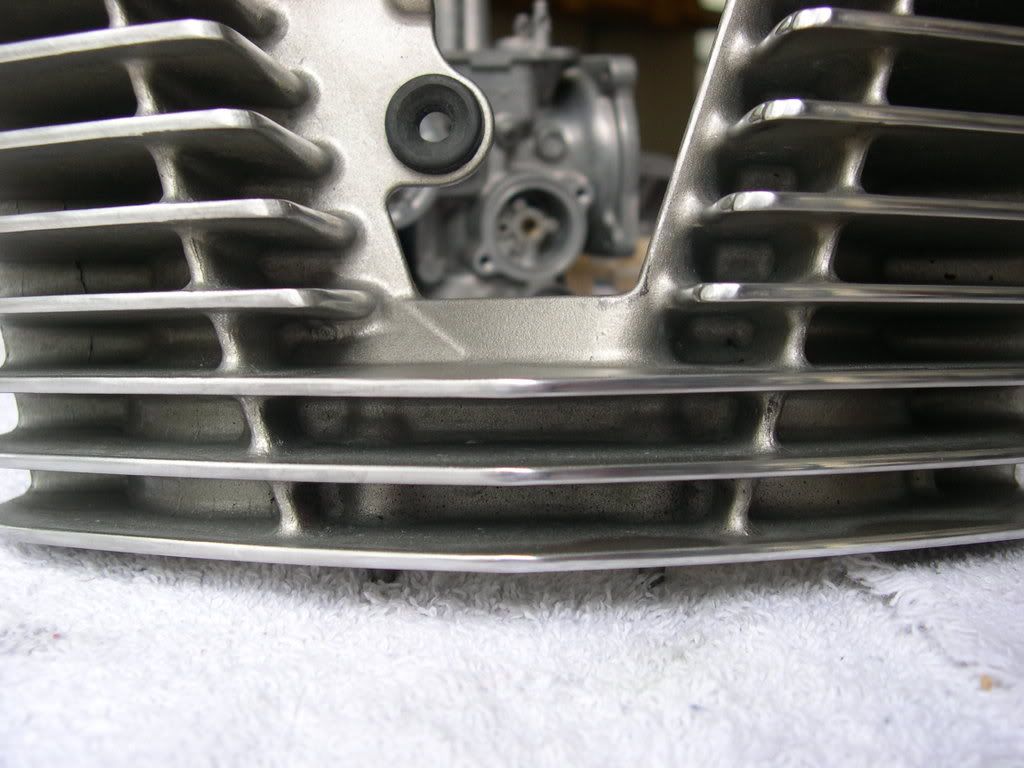
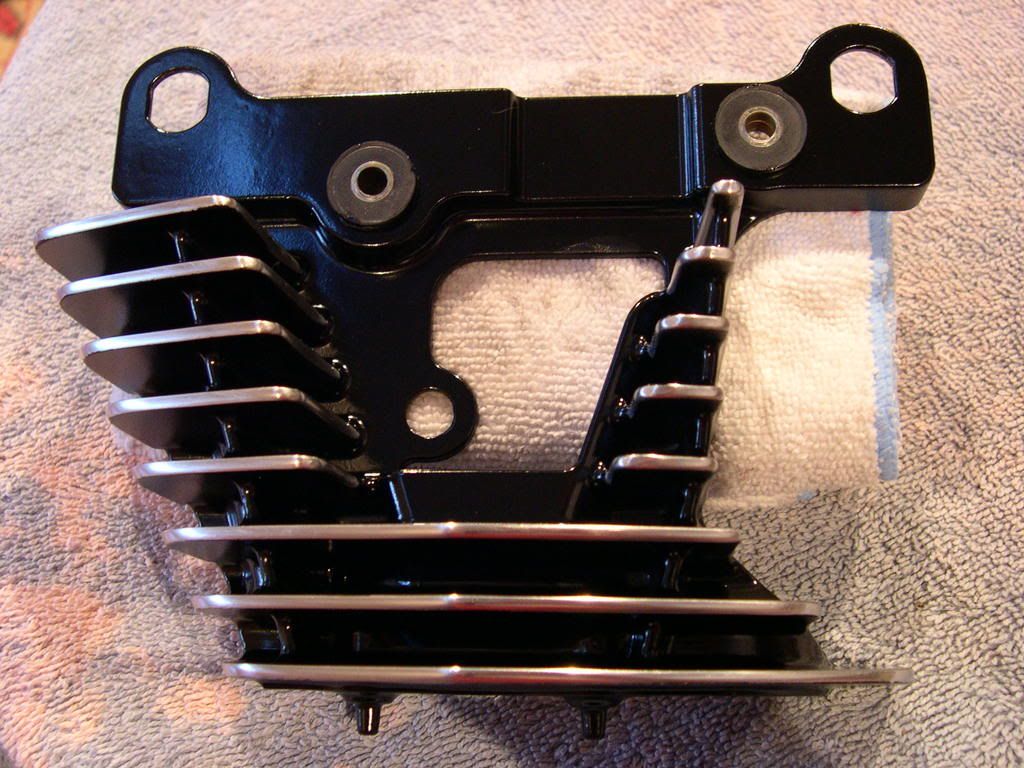
In this picture, I polished the right-side of this shroud. The left side is at the 1500 wet-sand stage, for comparison.


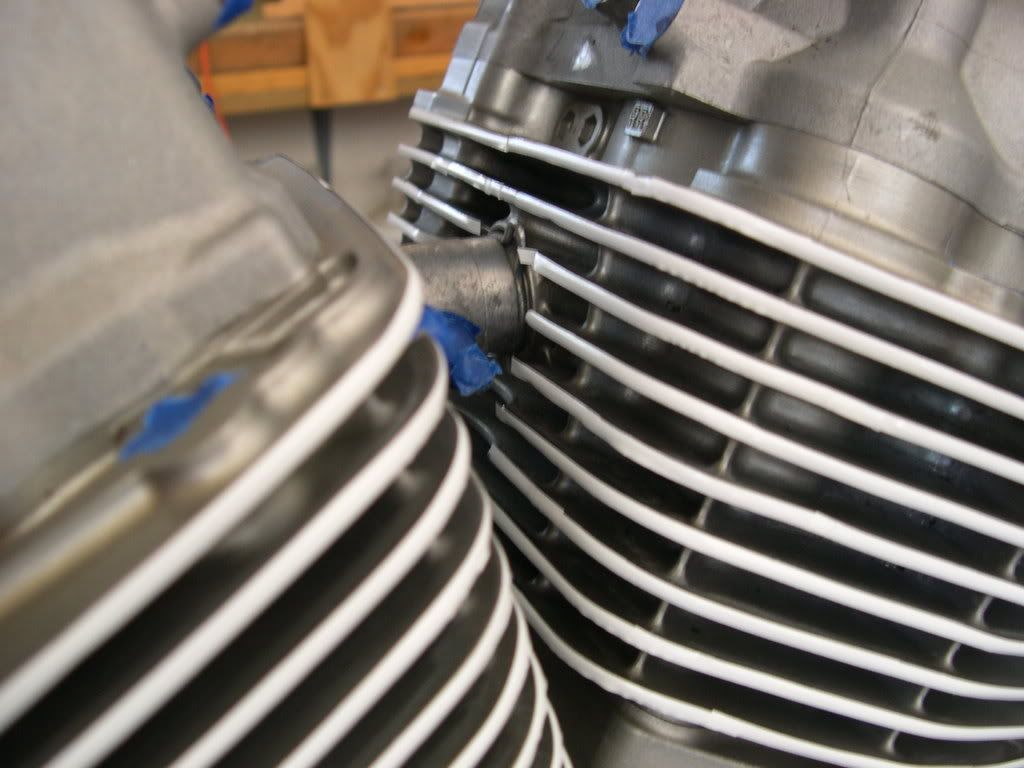
To get to the hard-to-reach fins, I used Nevr-Dull wadding polish and shined up the fins the best that I could.

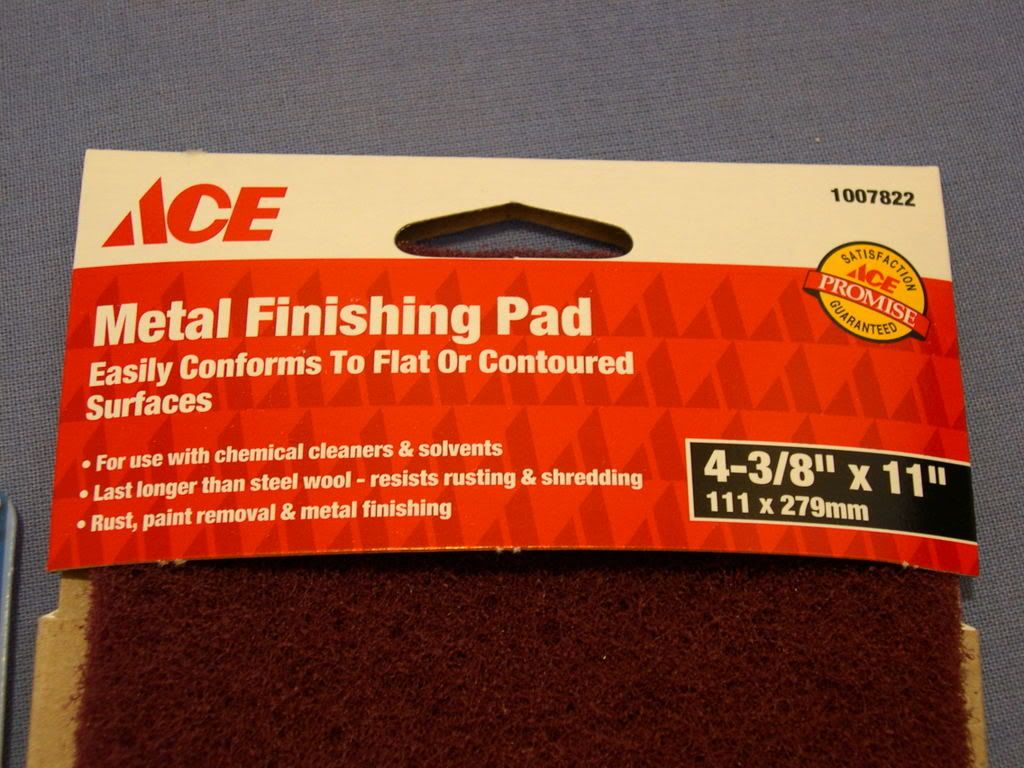
I painted the shrouds tonight. I soaked all the shrouds in a bucket of dishwashing soap and hot water to break loose the grime. Then I carefully cleaned really well in between all the fins using a sponge. Once I was satisfied they were cleaned well, I scuffed them up with this product from Ace Hardware, which is equivalent to a red Scotch-Brite pad.


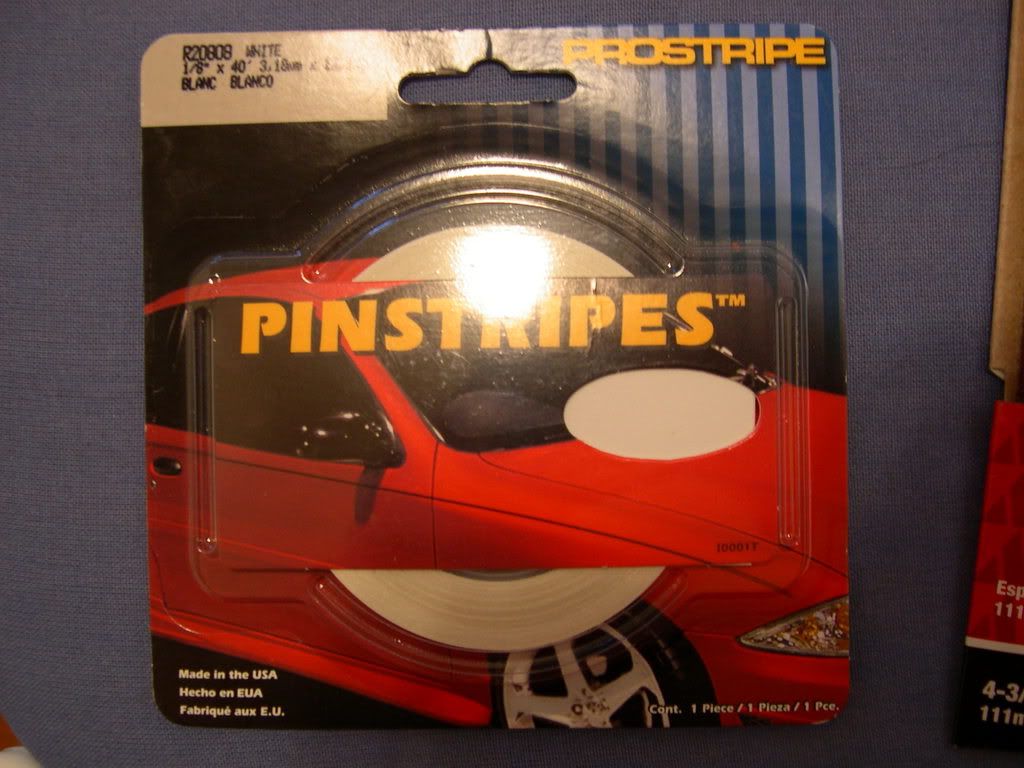
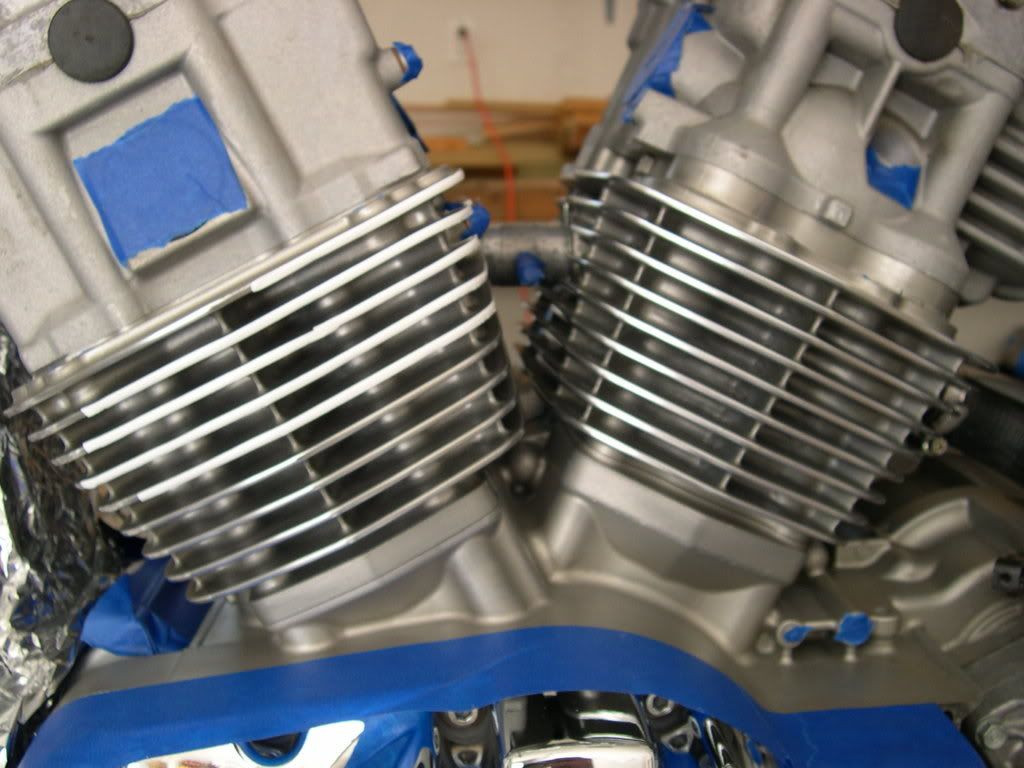
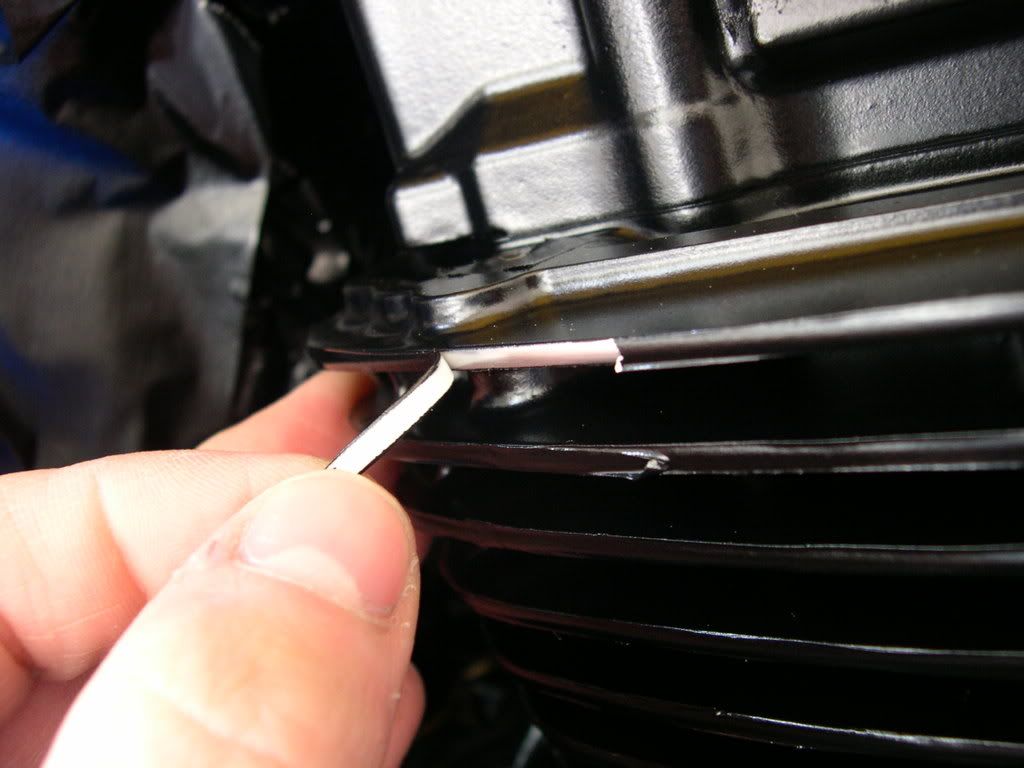
Then they were rinsed well and dried using my air compressor. After letting them dry a little longer, I taped off the fins using 1/8" pin striping I bought from AutoZone. It worked perfectly. I also took off all the grommets and used blue painter's tape to cover the rubber nuts so they wouldn't get painted.


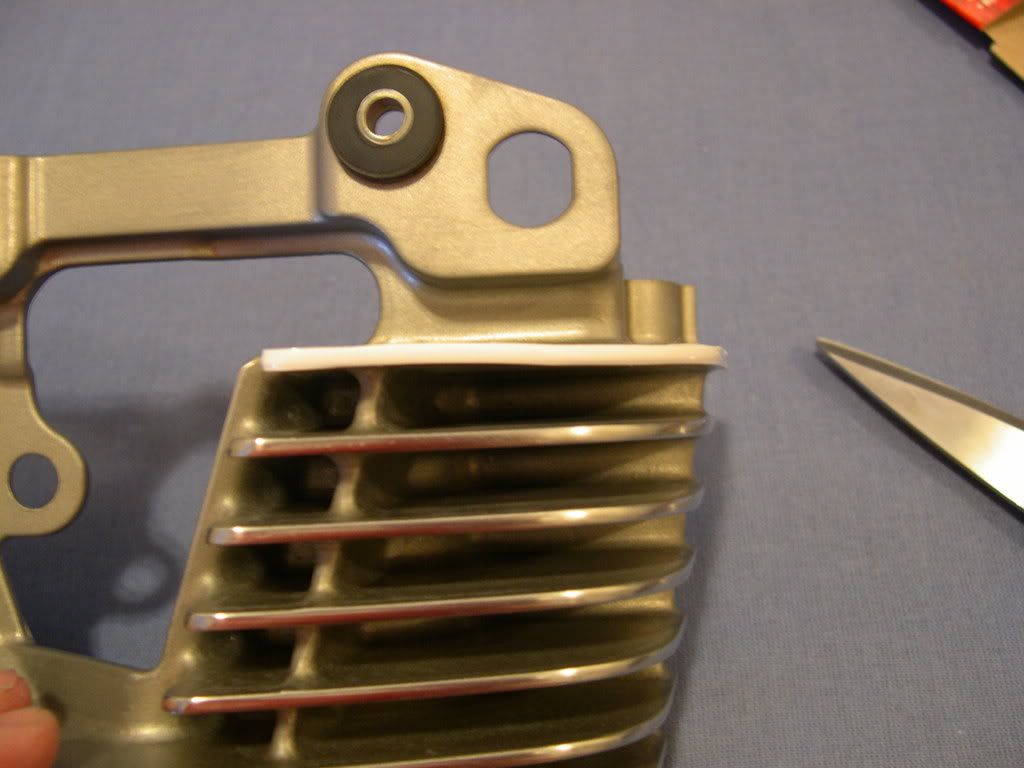
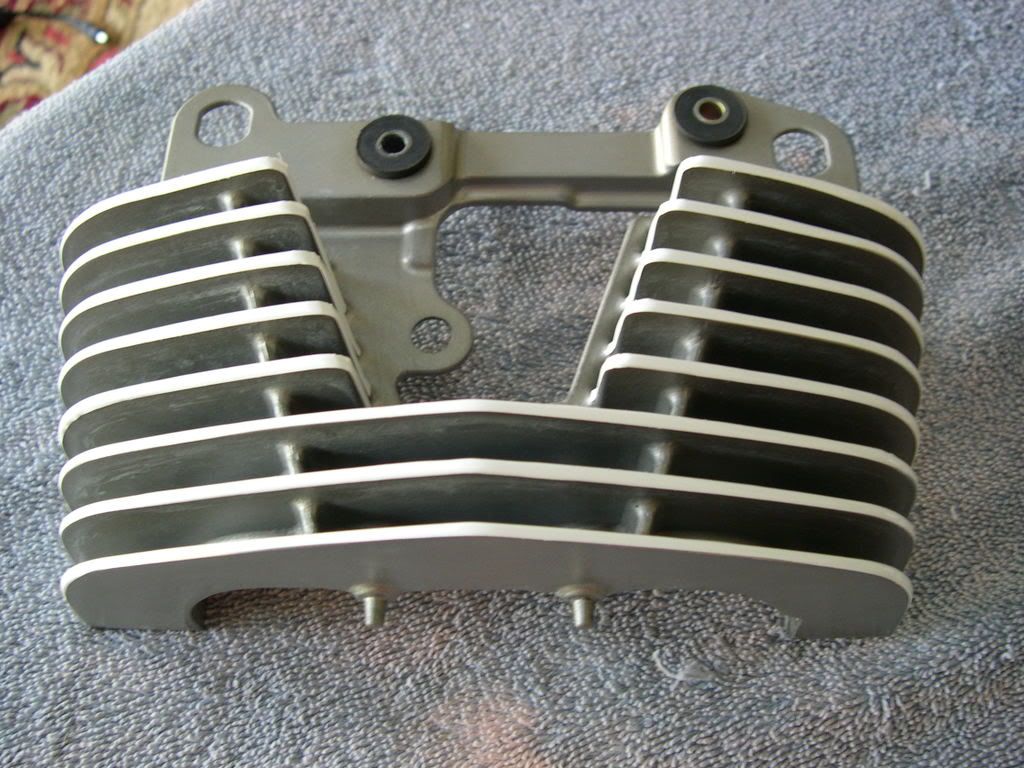
Then I went out to the garage, covered everything with towels, blankets, tarps and anything else I could find so no overspray would get on the bikes or anything else. Then I layed the shrouds down on some cardboard and followed the instructions for the DupliColor Semi-Gloss 500-degree paint. I sprayed two light coats within 10 minutes of each other, and then a third heavier coat. I also used a flashlight and peeked into the spaces in between the fins and sprayed where appropriate for uniform coverage.


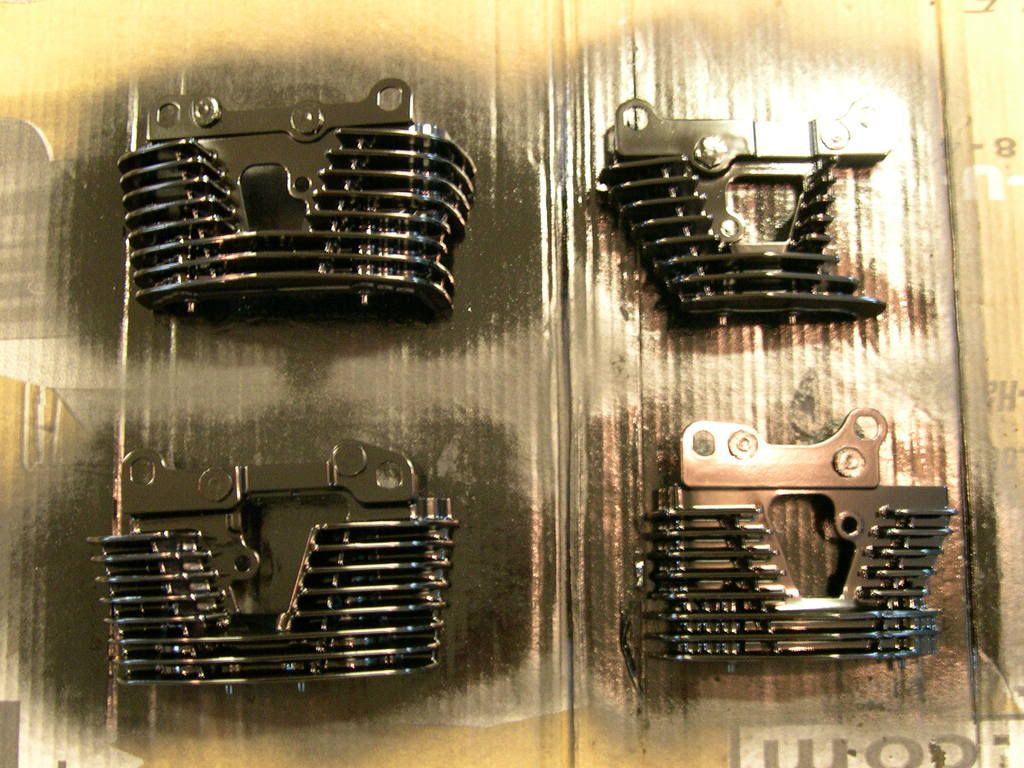
After about an hour, they were dry to the touch, so I took them inside, sat down on the couch and started pulling the pinstriping off.  As I pulled them off, I got that same _____-eatin' grin like I had the day I brought her home!   ;D ;D


Okay, so here was today's agenda:

* Woke up at 7am ready to rock. Ate breakfast and filled up with caffeine.
* Scrubbed down the entire surface to be painted with the red pad.
* Went back over the fins with Nevr-Dull Wadding Polish.
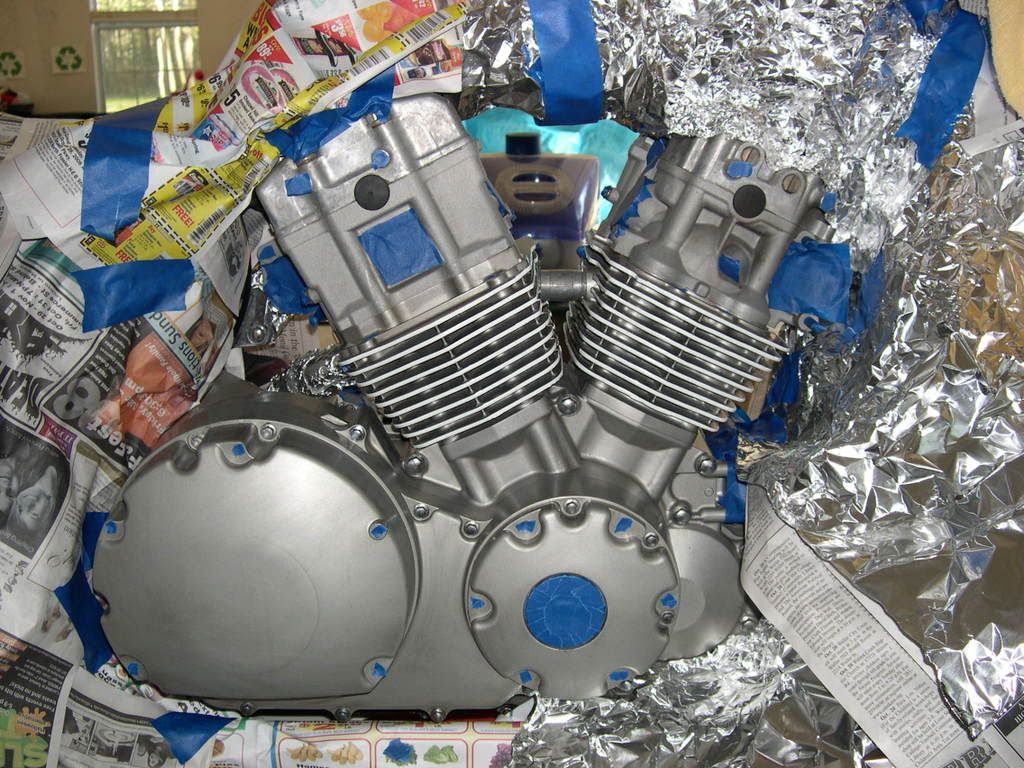
* Washed the engine with dishwashing soap, hot water and a sponge to get in the nooks and crannies.
* Rinsed engine with fine mist from the water hose and spray nozzle.
* Blew out all the remaining water with the air compressor really well.
* Let engine dry.
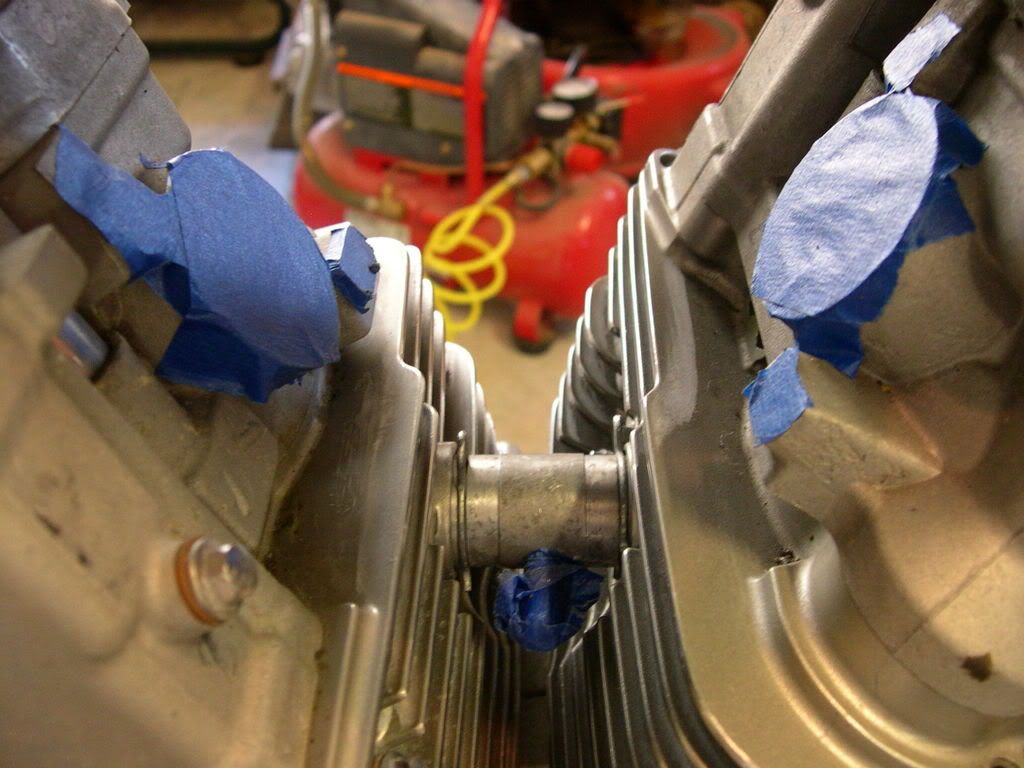
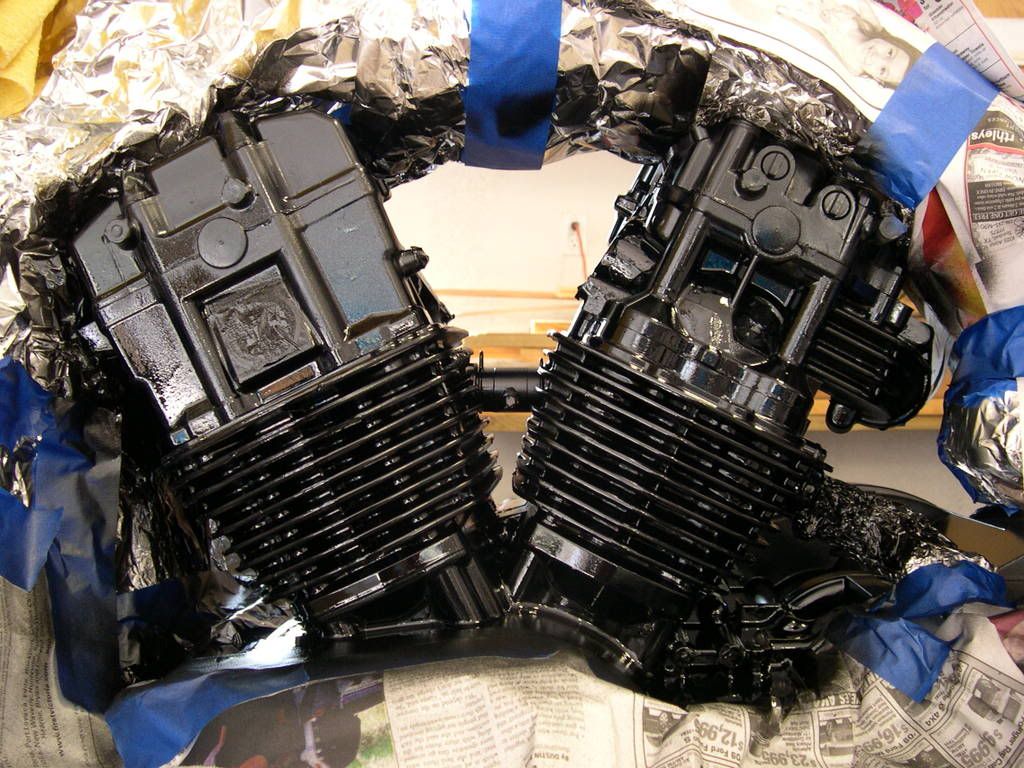
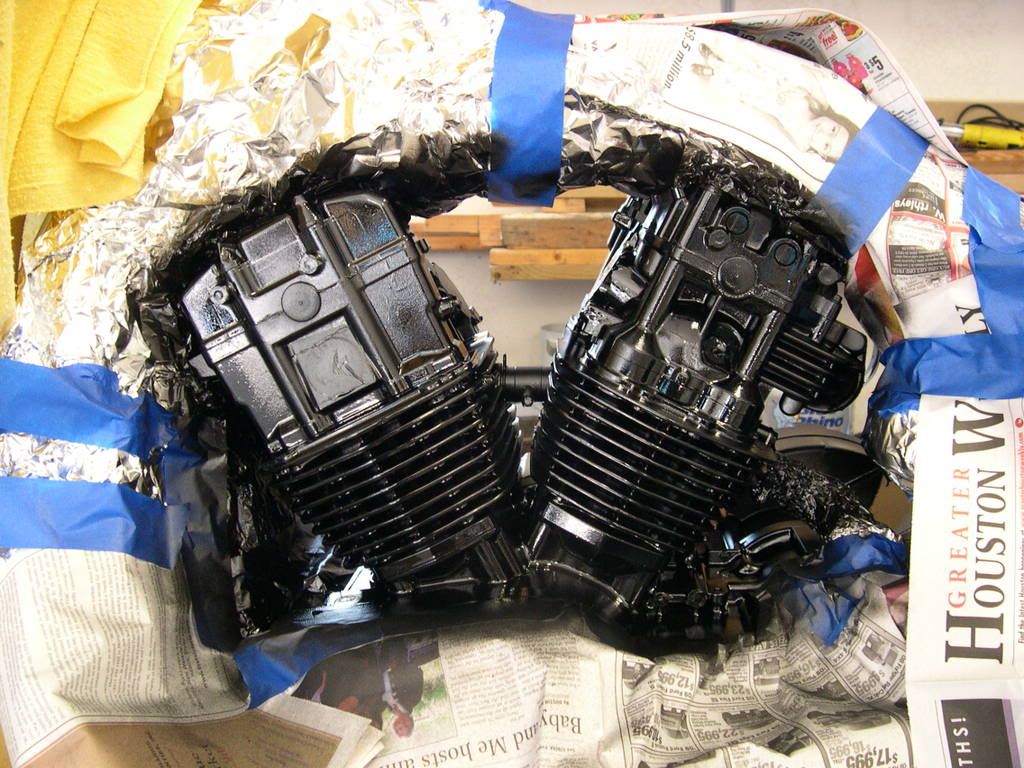
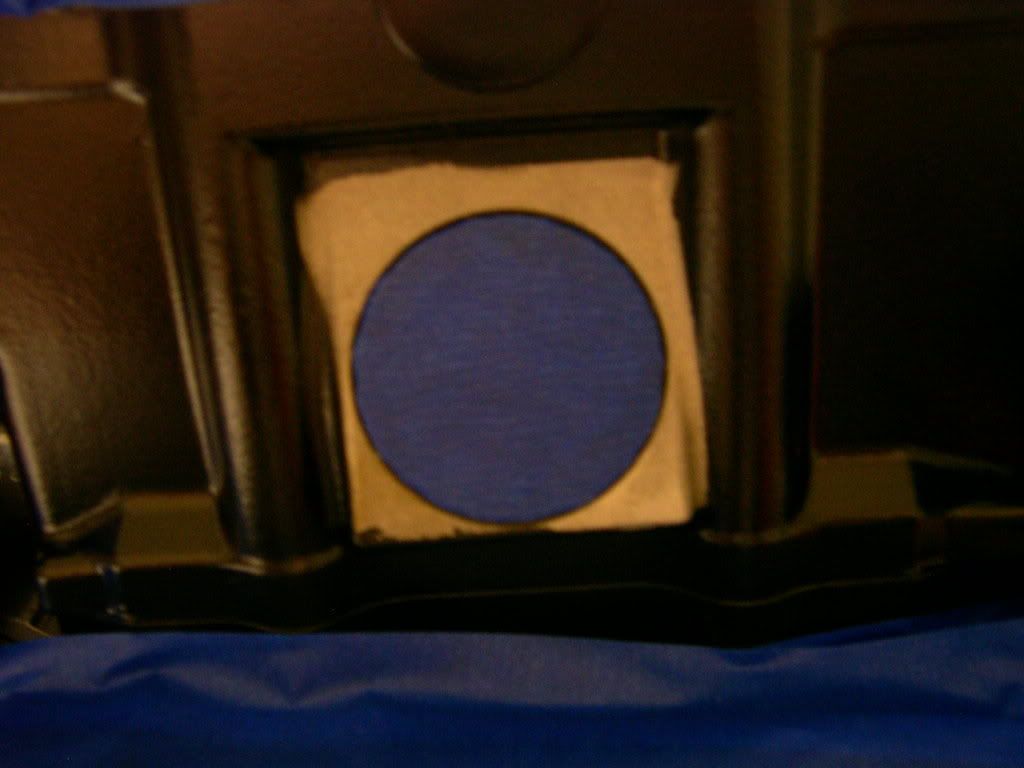
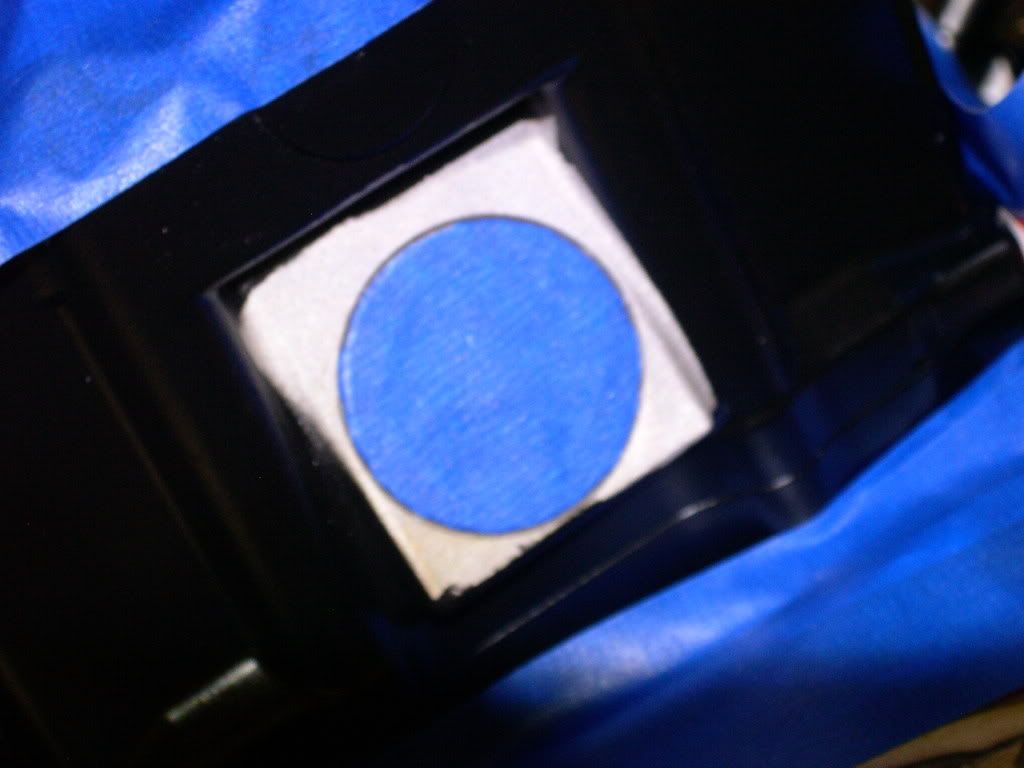
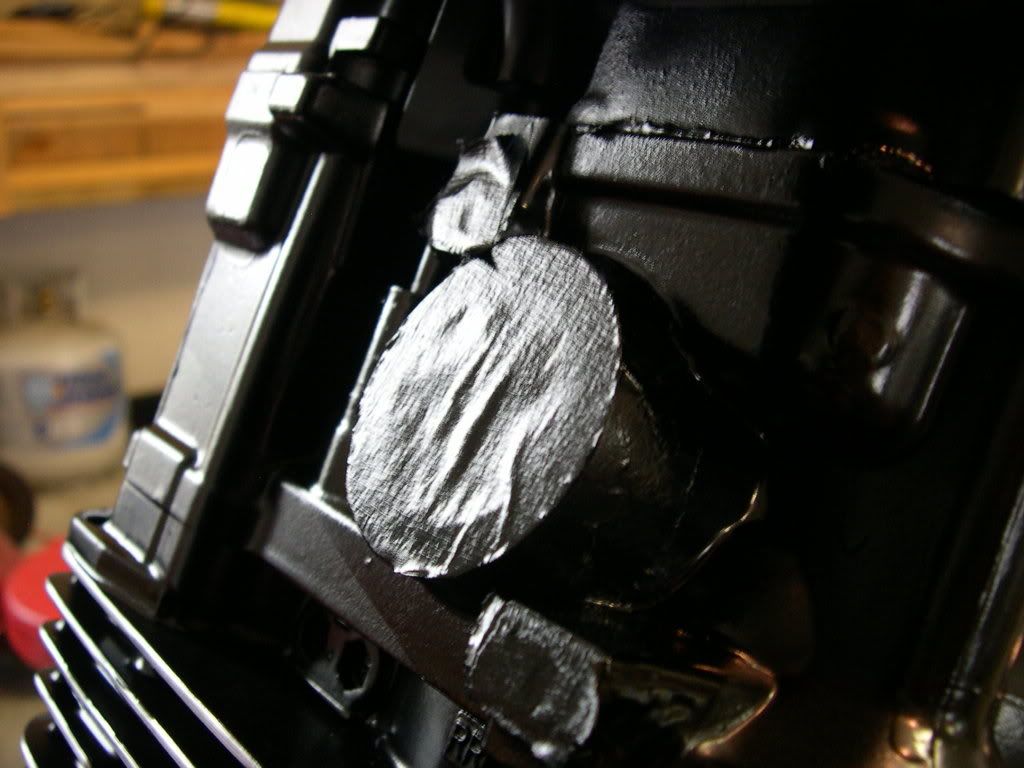
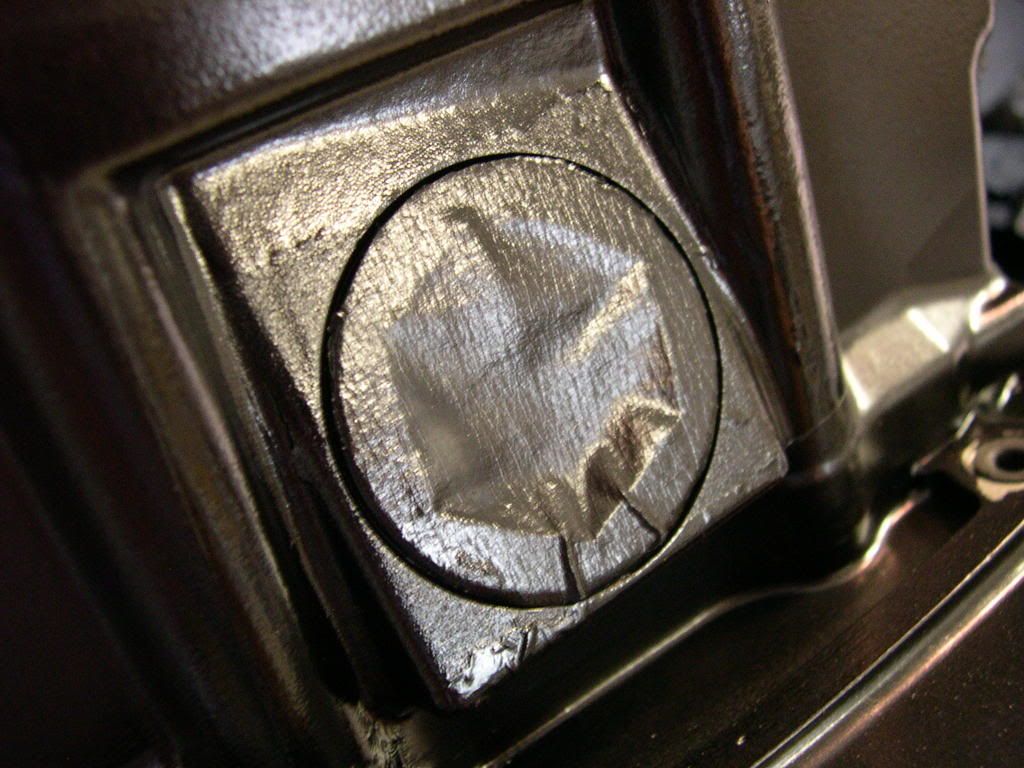
* Taped down all exposed threaded holes, exhaust ports, manifold ports, spark plug holes, inlet between jugs and any other place I didn't want paint (used blue painter's tape).
* Pinstriped fins (OMG...I don't care how much money someone would pay me to do this...uh uh...no more!).  :banghead:
* Wrapped all other areas with blankets, foil, newspaper...basically anything that did the job well.


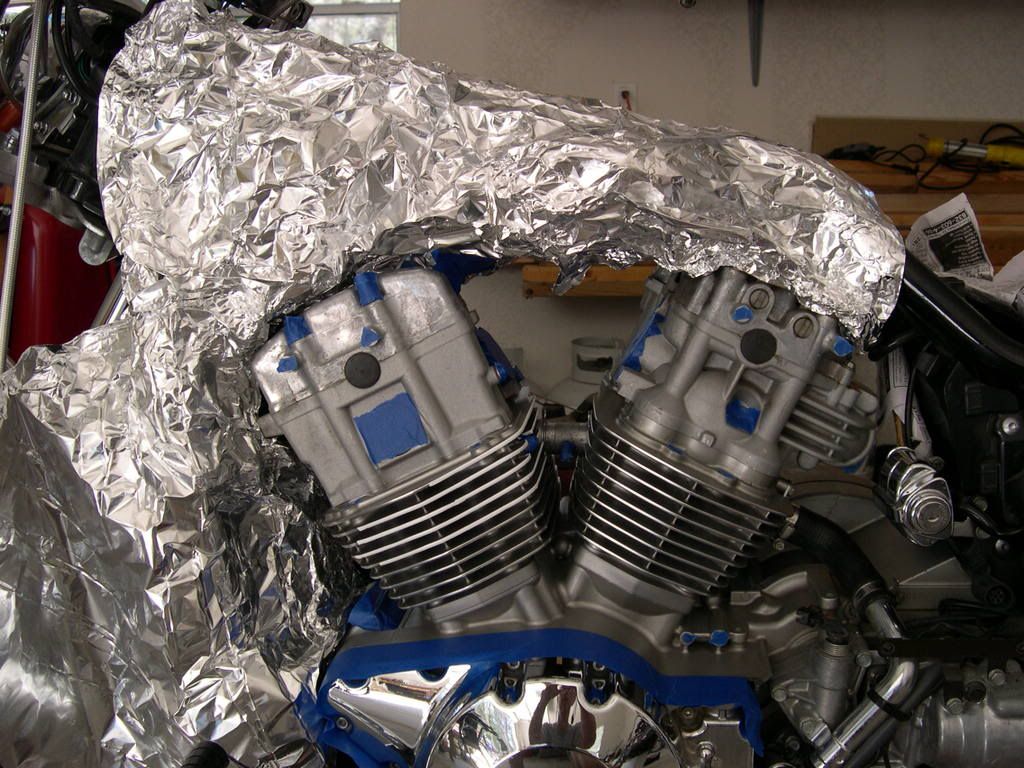
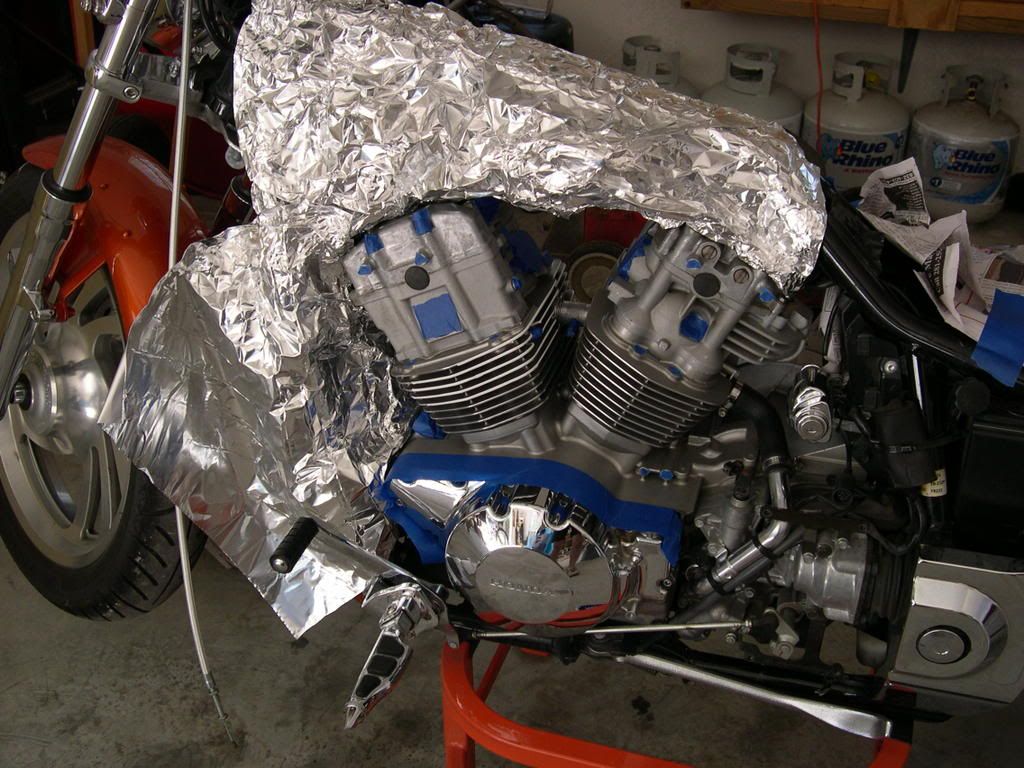
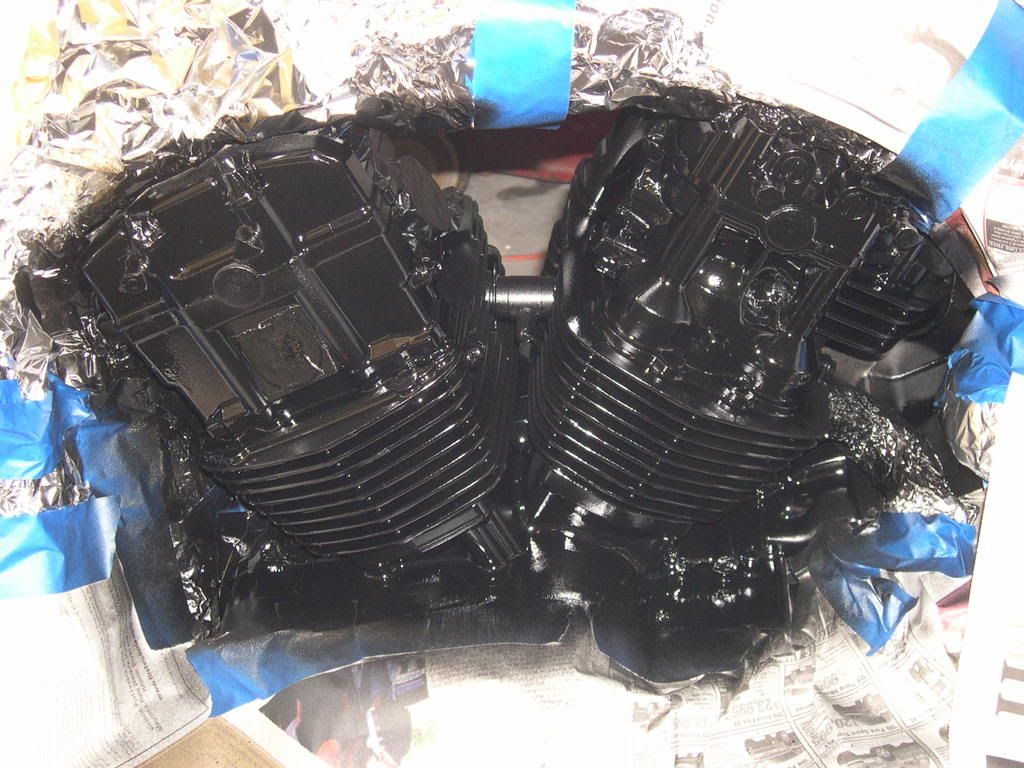
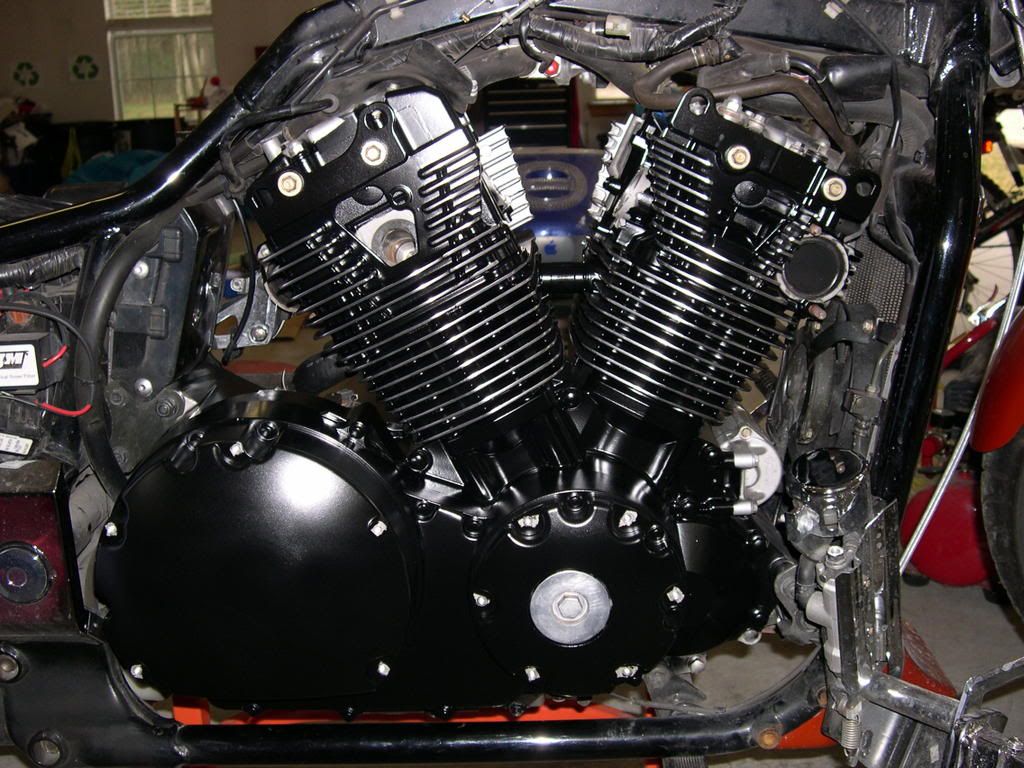
Then it was finally time to spray. I did three coats again, just like I did on the shrouds.  I also went back out and touched up areas in between the fins where it needed it.  All in all, I almost used 2 full cans of paint!  :o


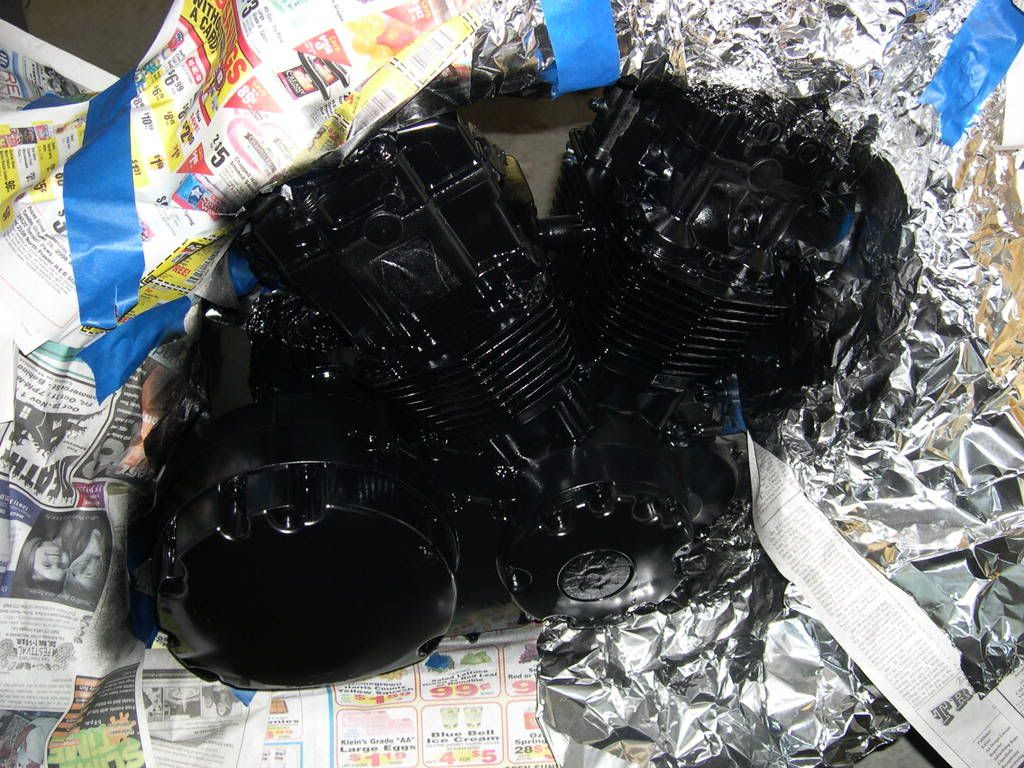
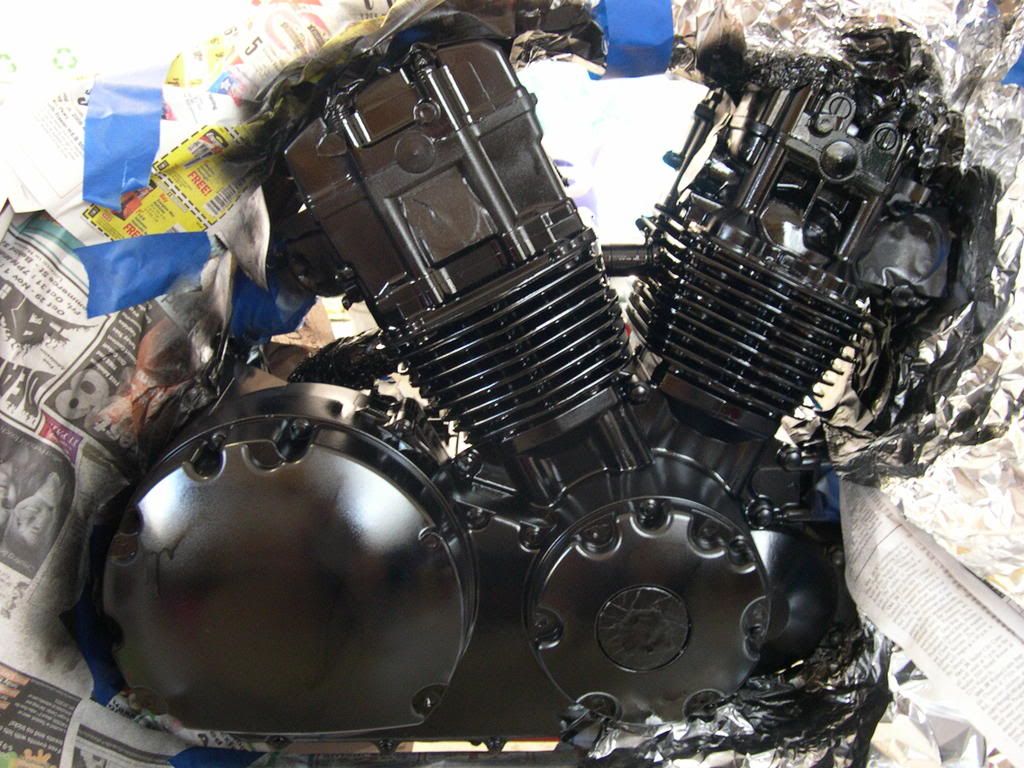
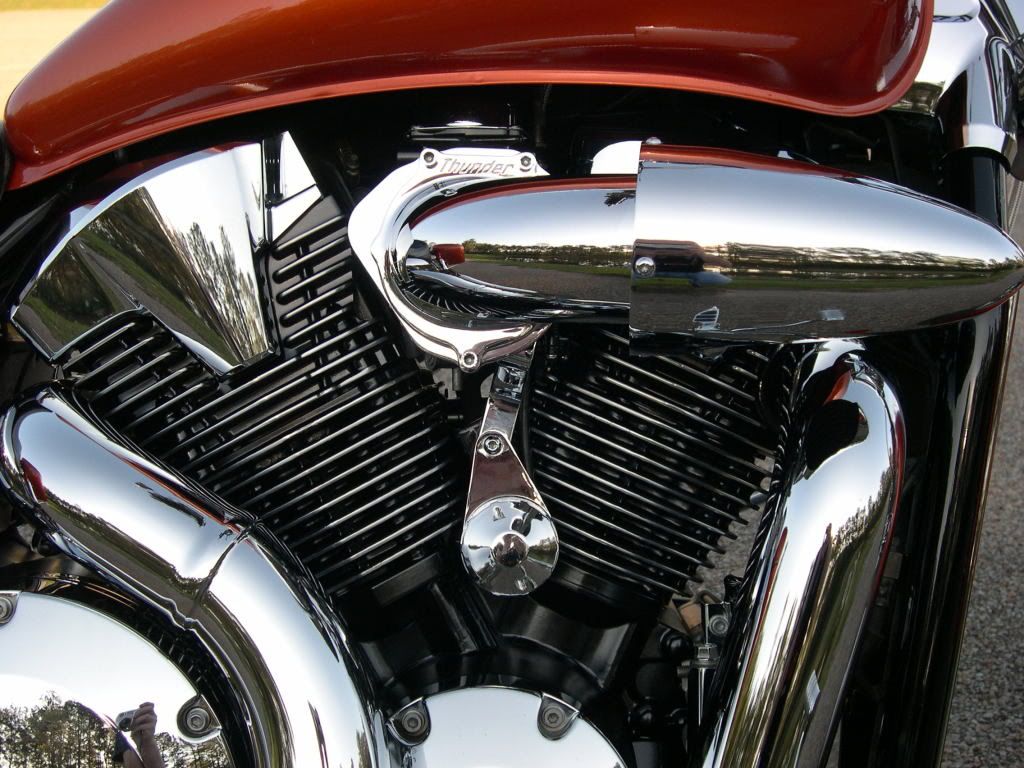
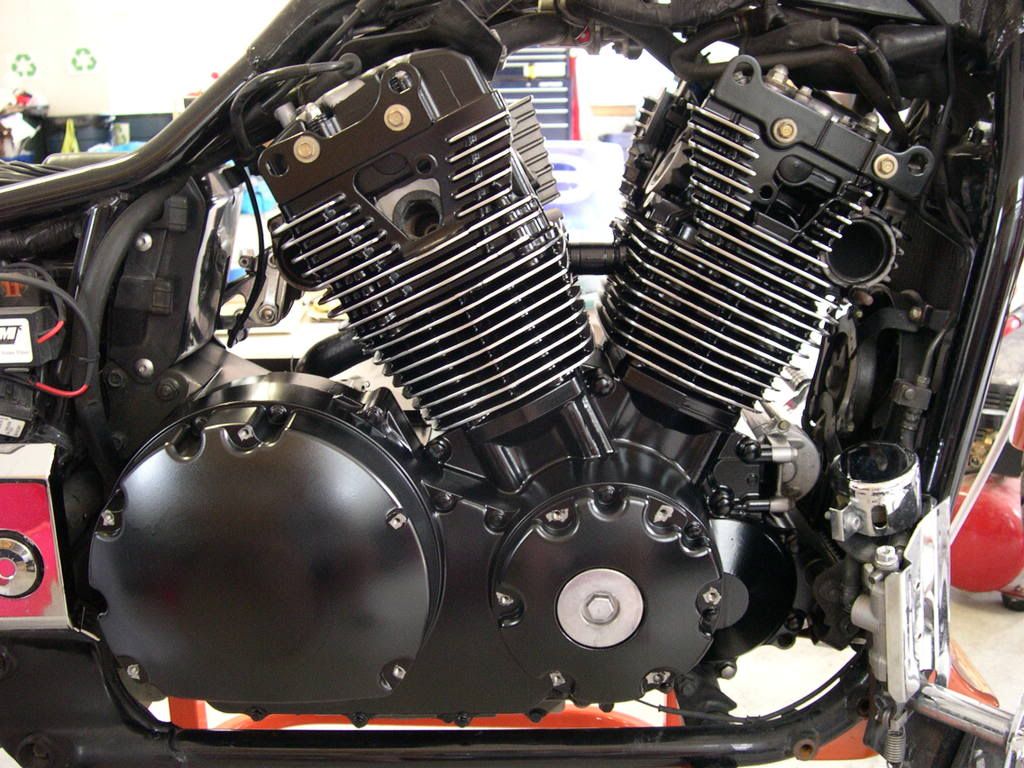
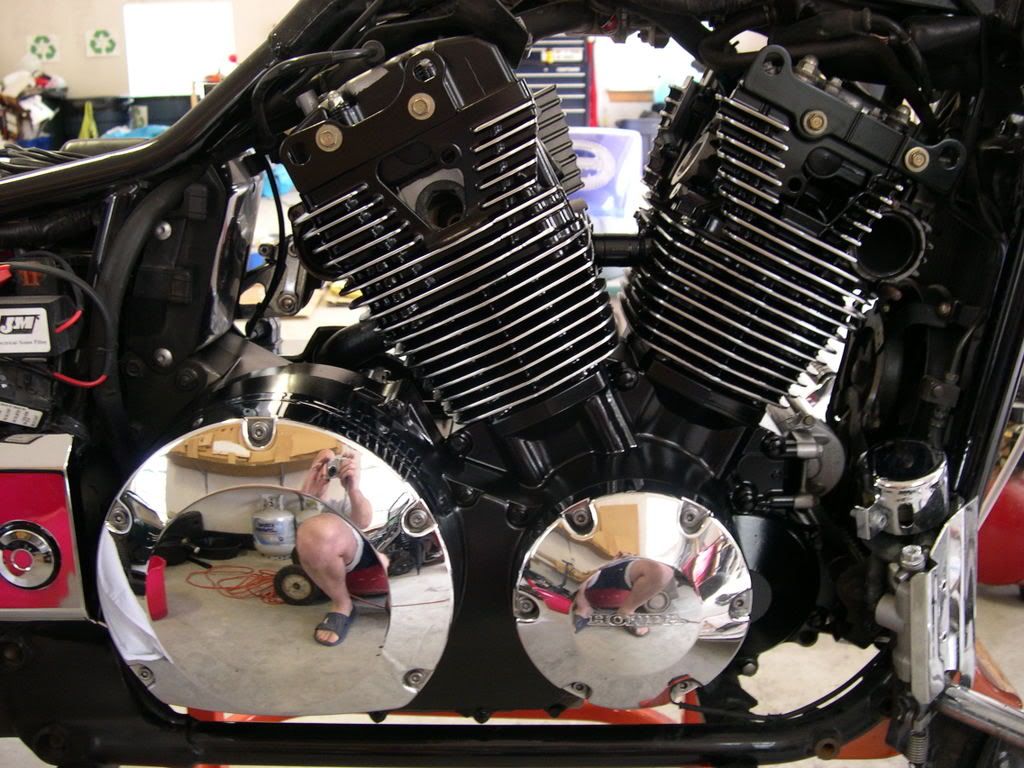
And I'm done!!  The bottom fins will need to be touched up a bit from the paint bleeding behind some of the pinstriping, but no big deal. I'll also touch up around the manifold ports, too.


And.....I'm happy!  I'll post final pictures after I'm done with all the other crap I have to do to the bike. It'll be another week or so before I get my carb parts in.


Well, since I can't edit my original post, I'll just have to continue with it in another post...
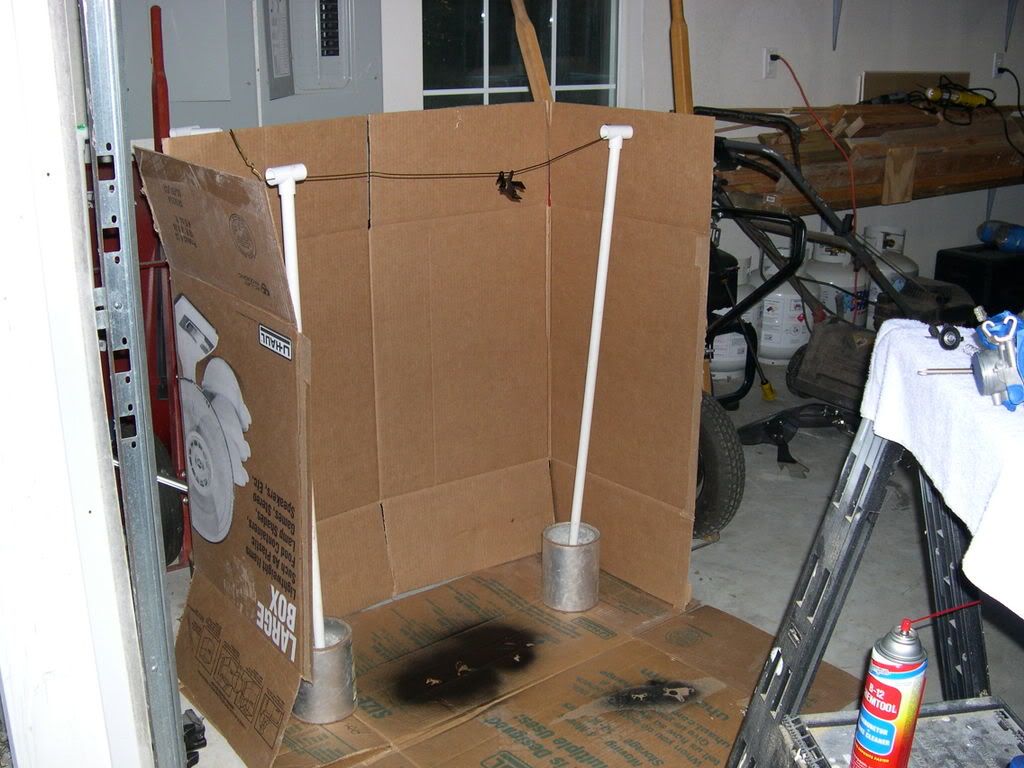
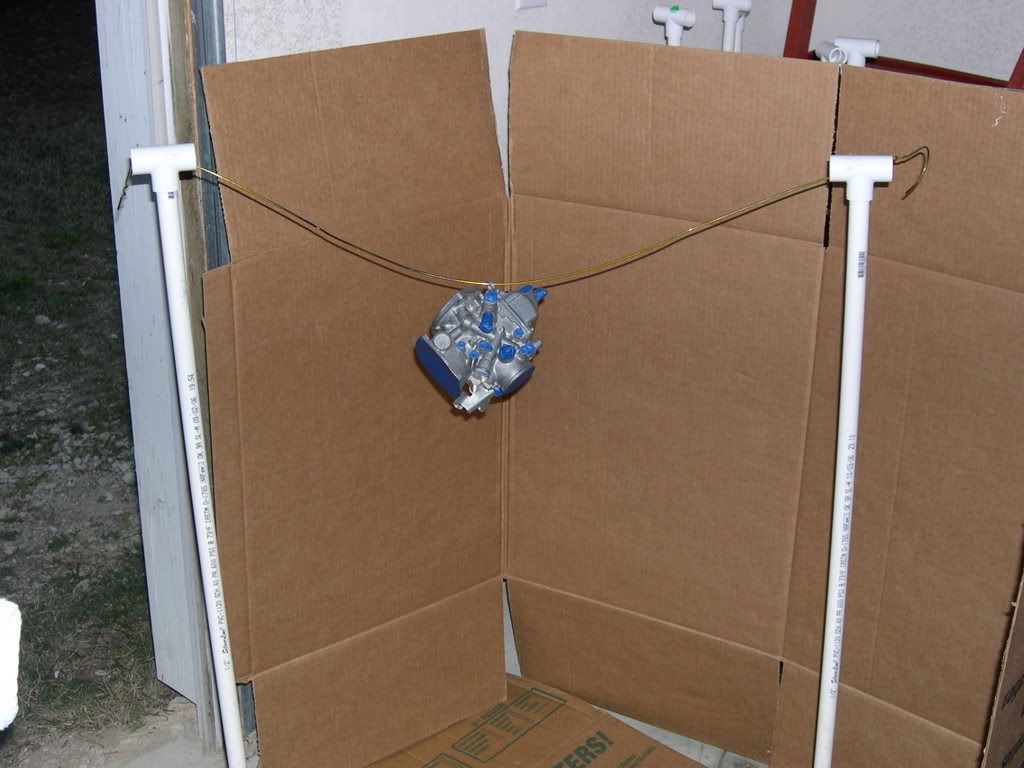
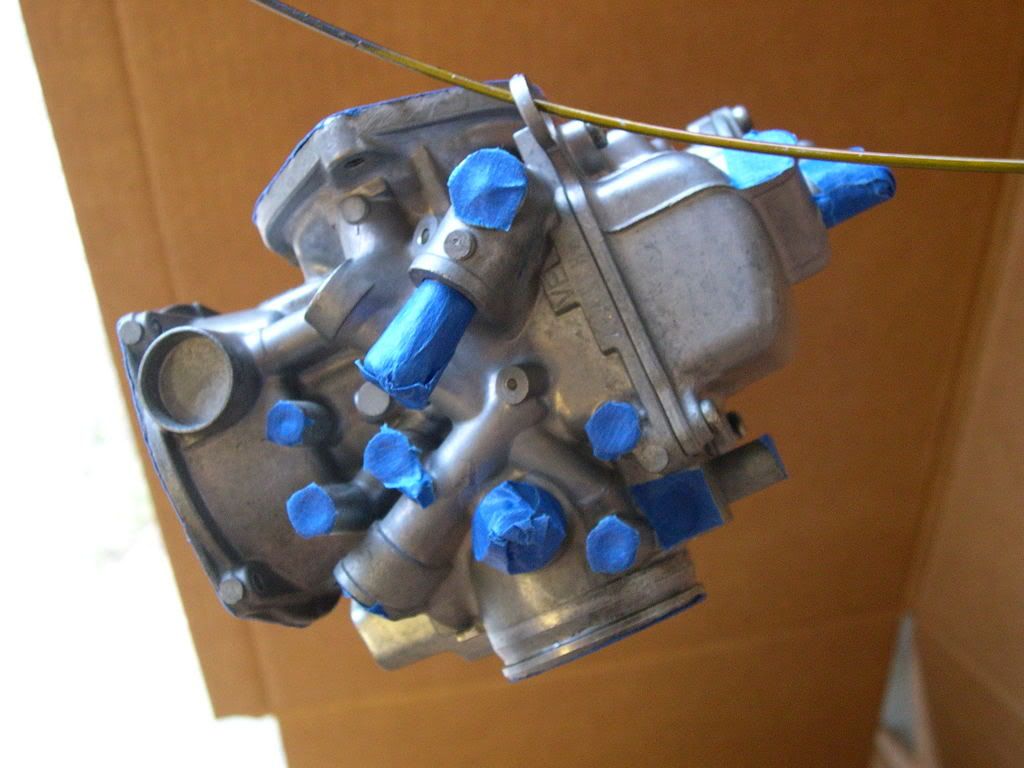
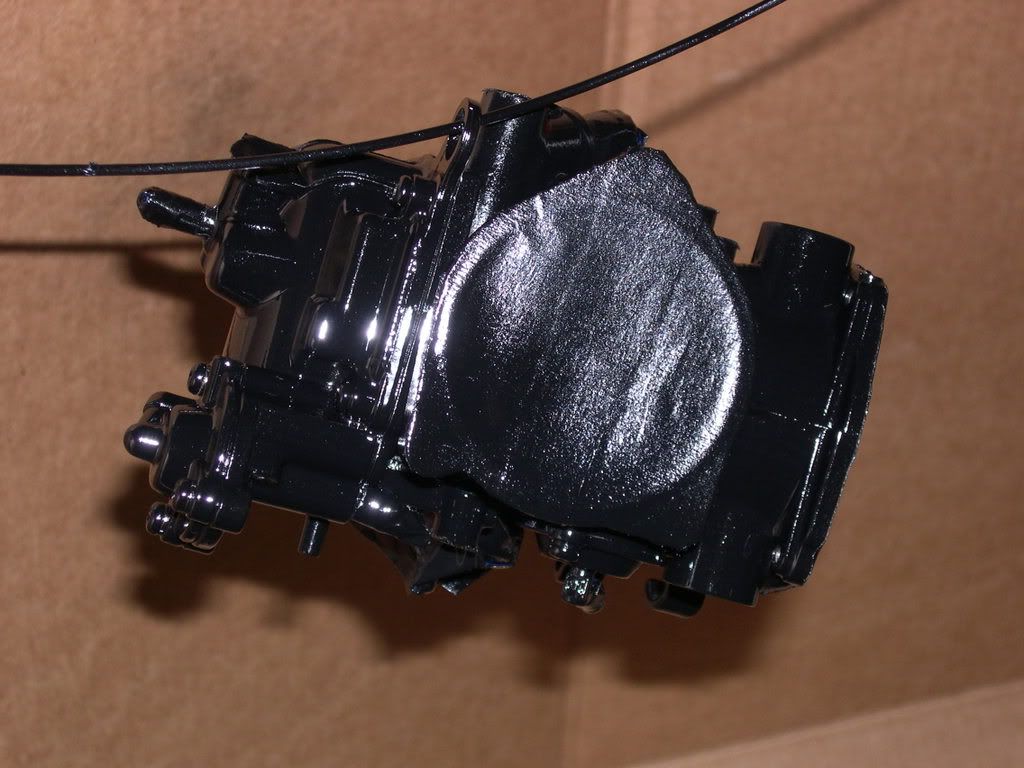
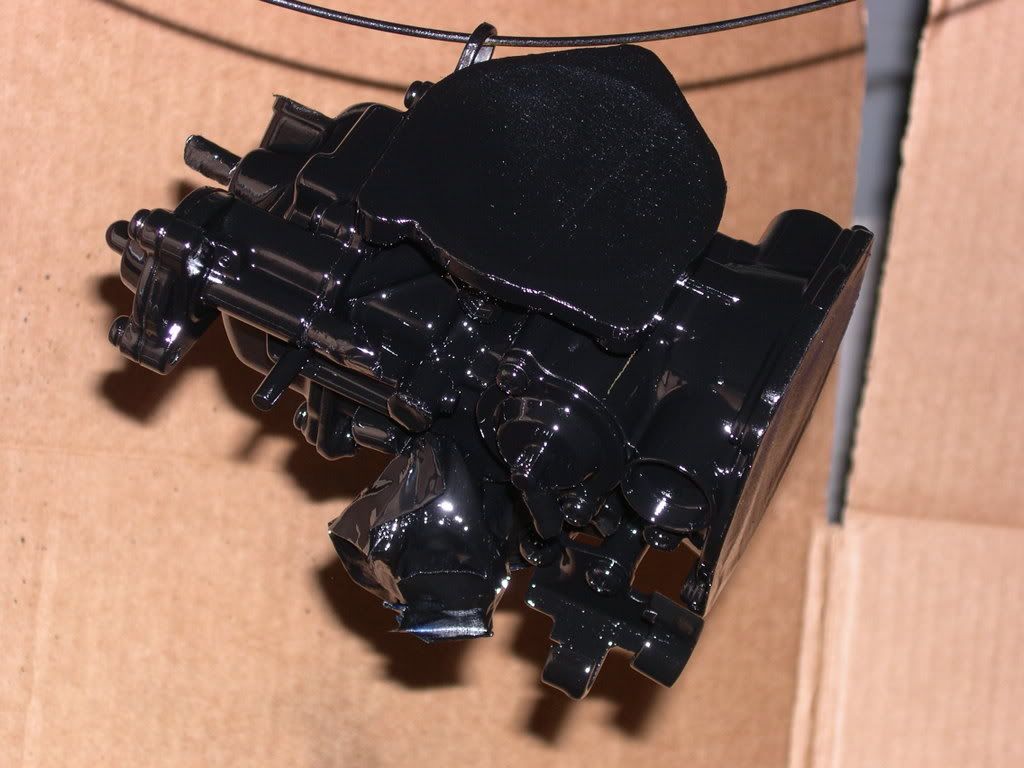
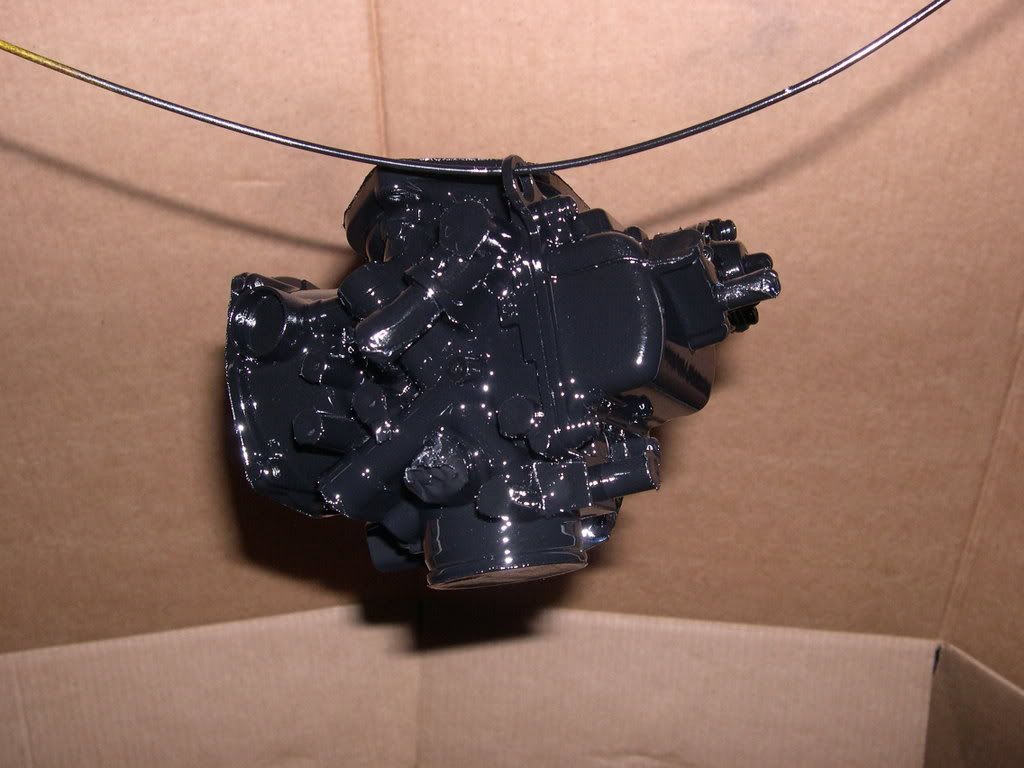
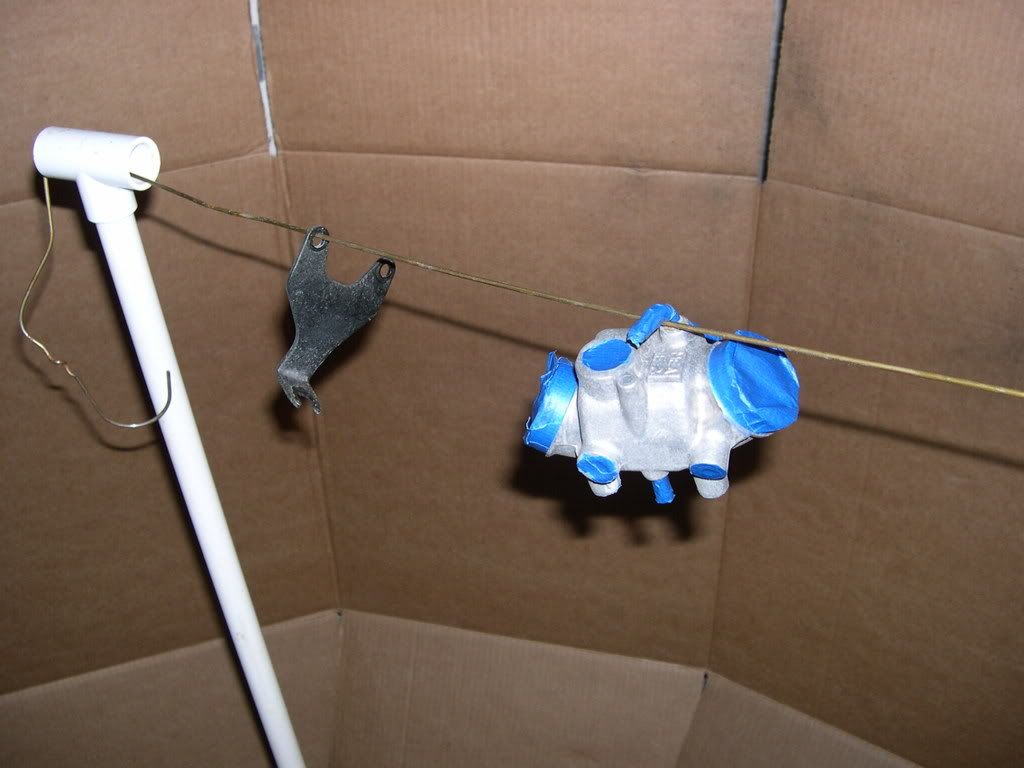
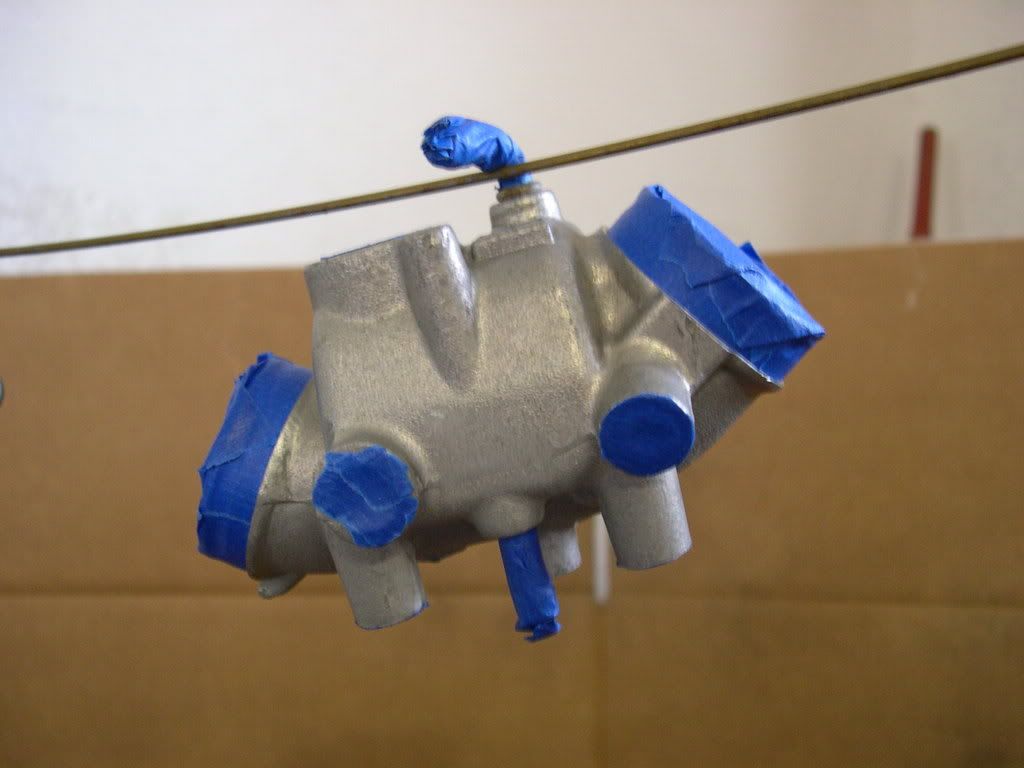
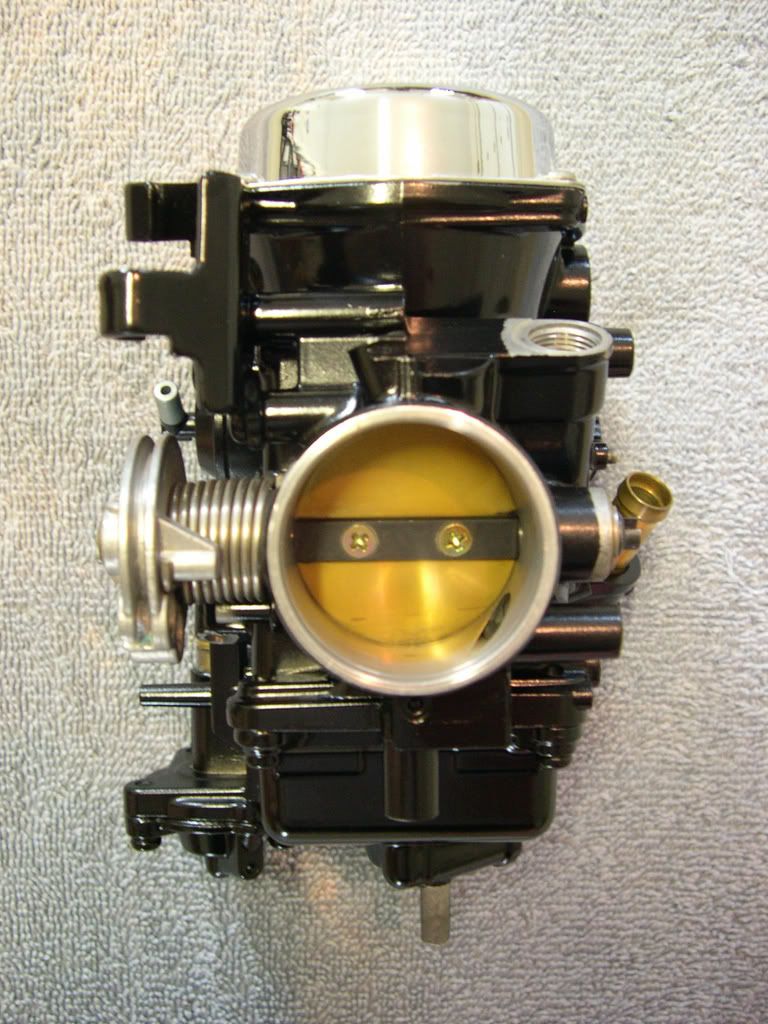
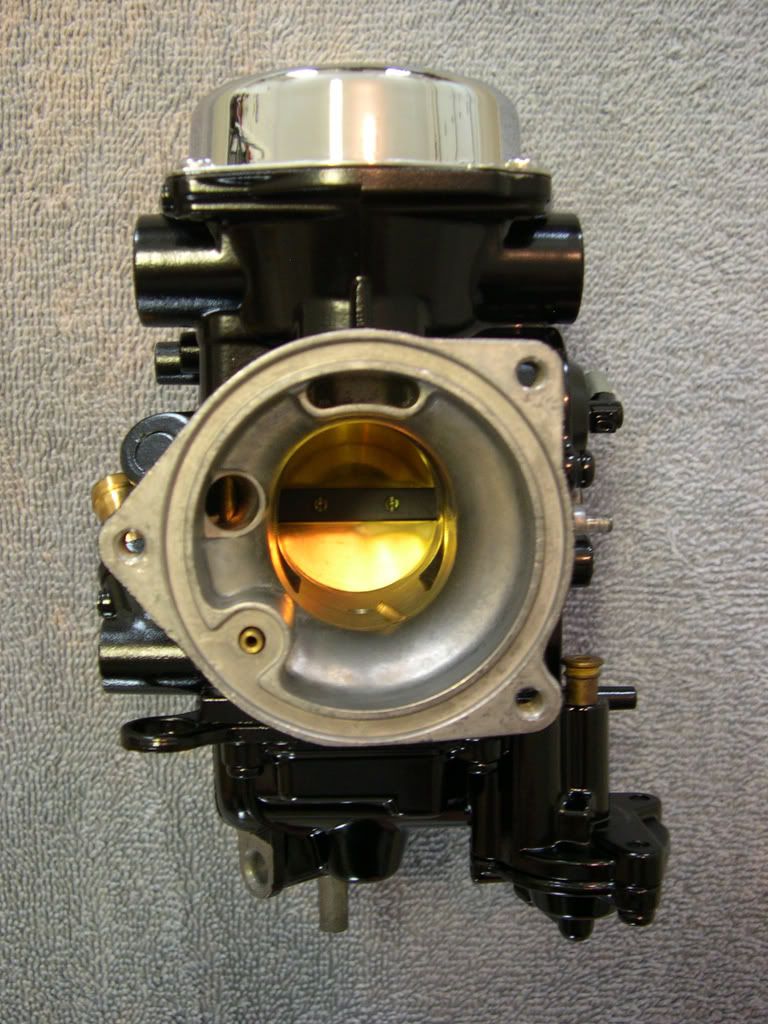
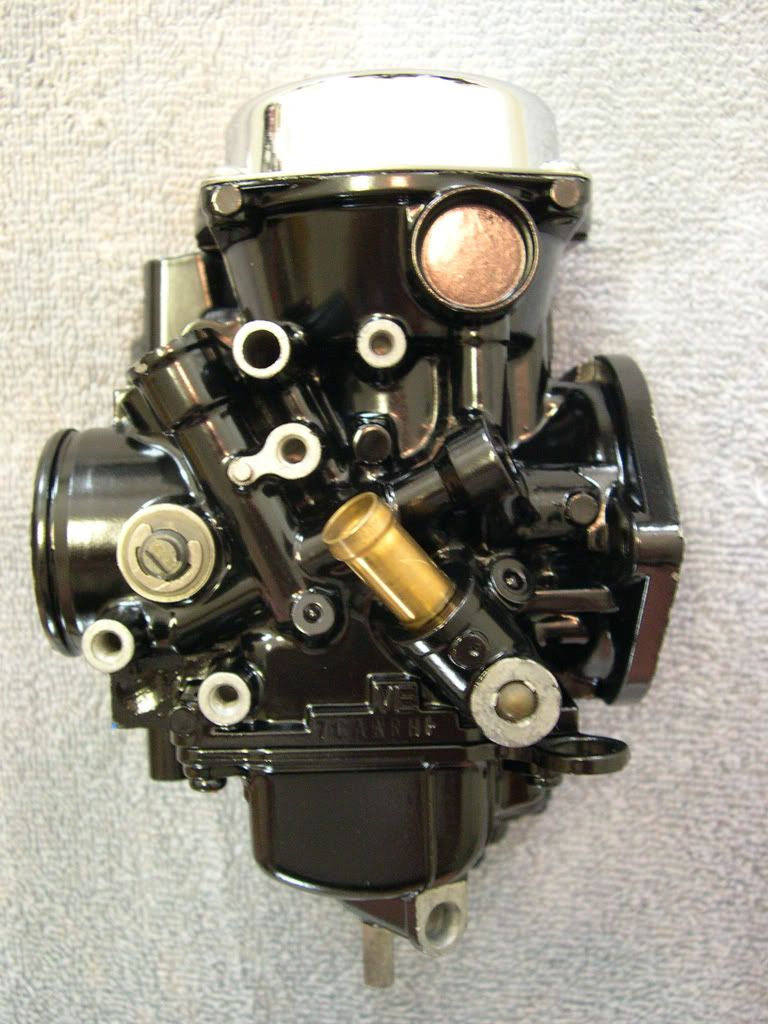
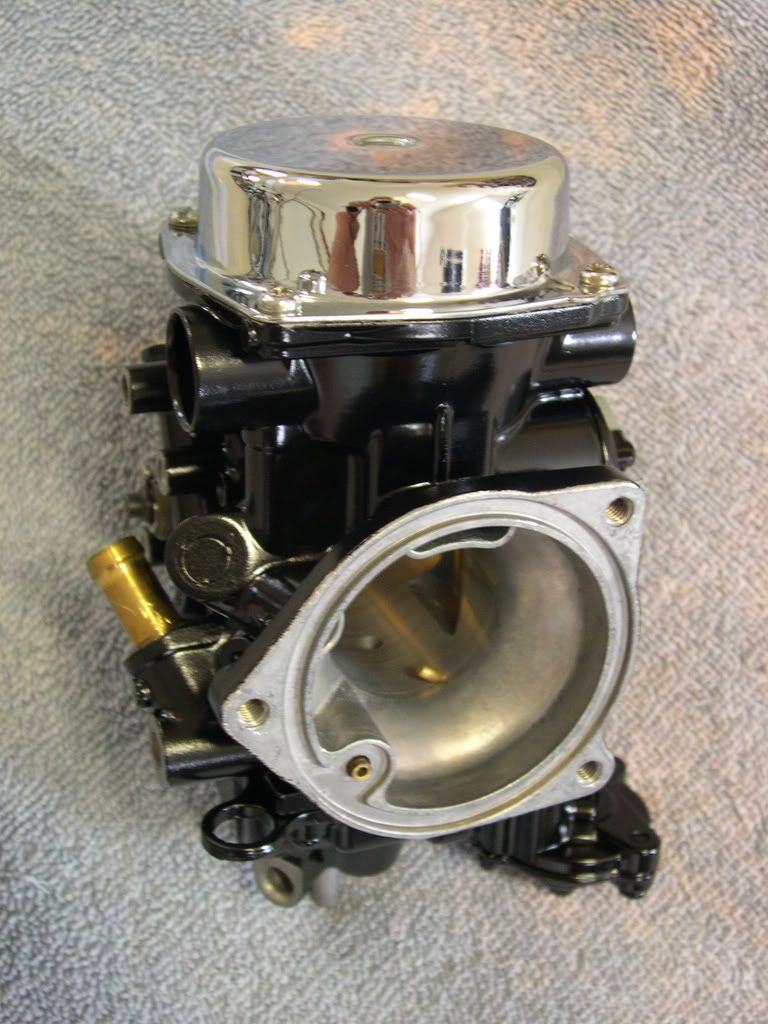
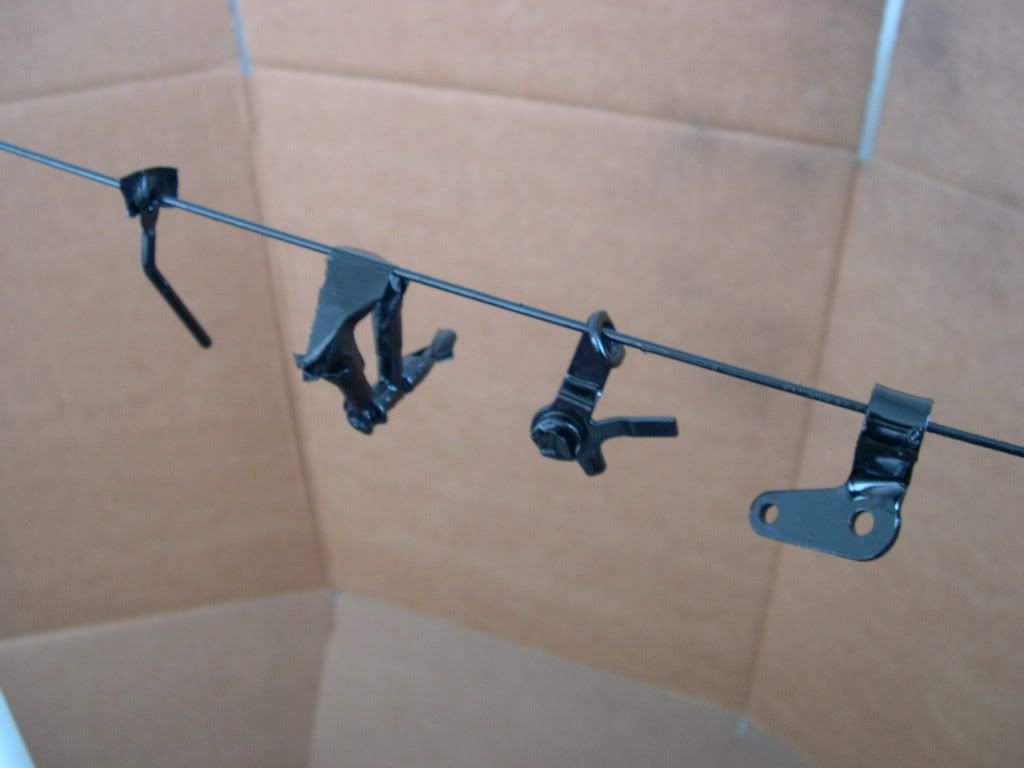
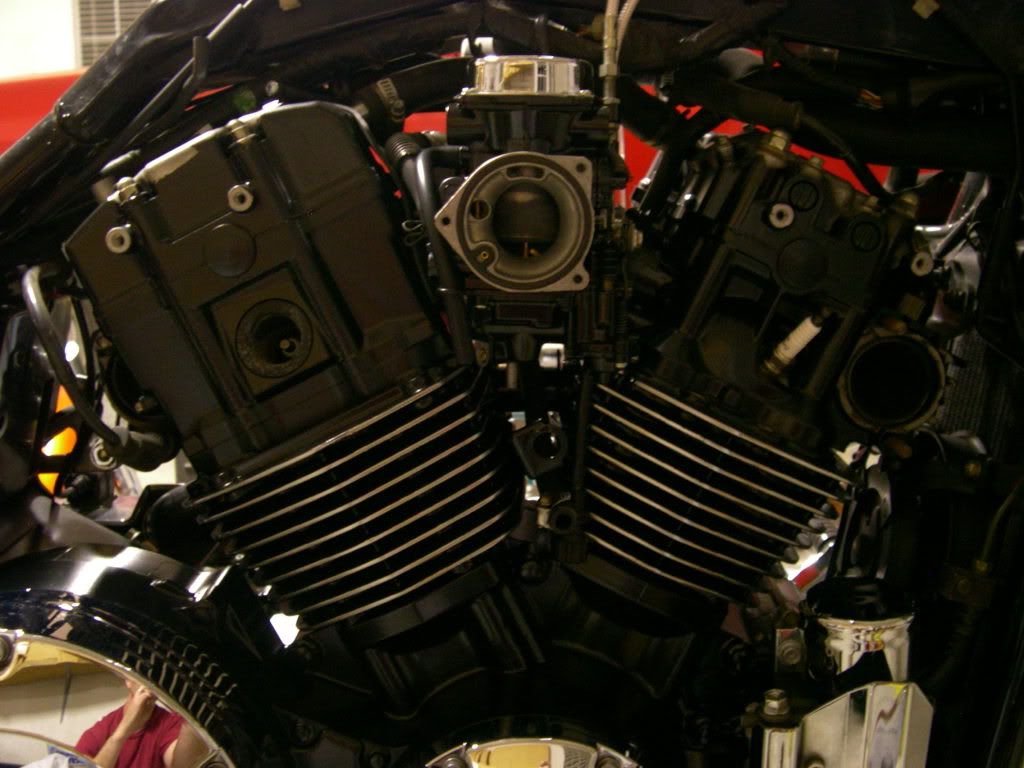
** Update **

Well, I kept thinking that the carb and manifold were going to stick out like sore thumbs, so I mustered up enough courage to paint them both. I setup my paint booth (Hick will love this one), taped everything off really well and went to town:


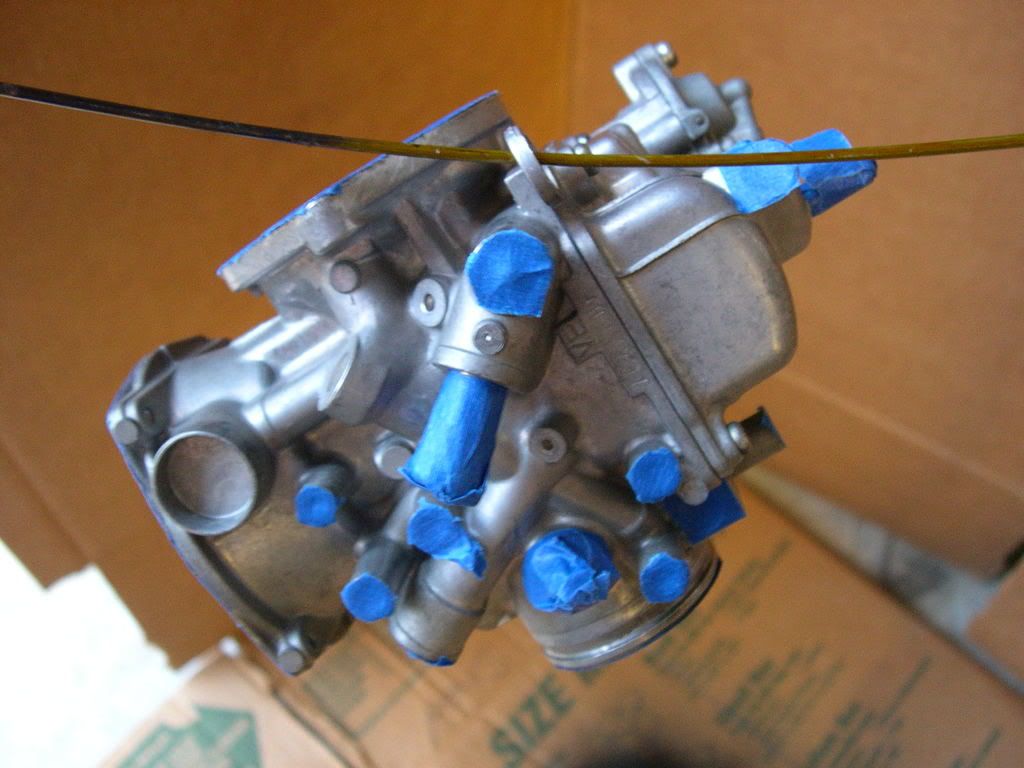
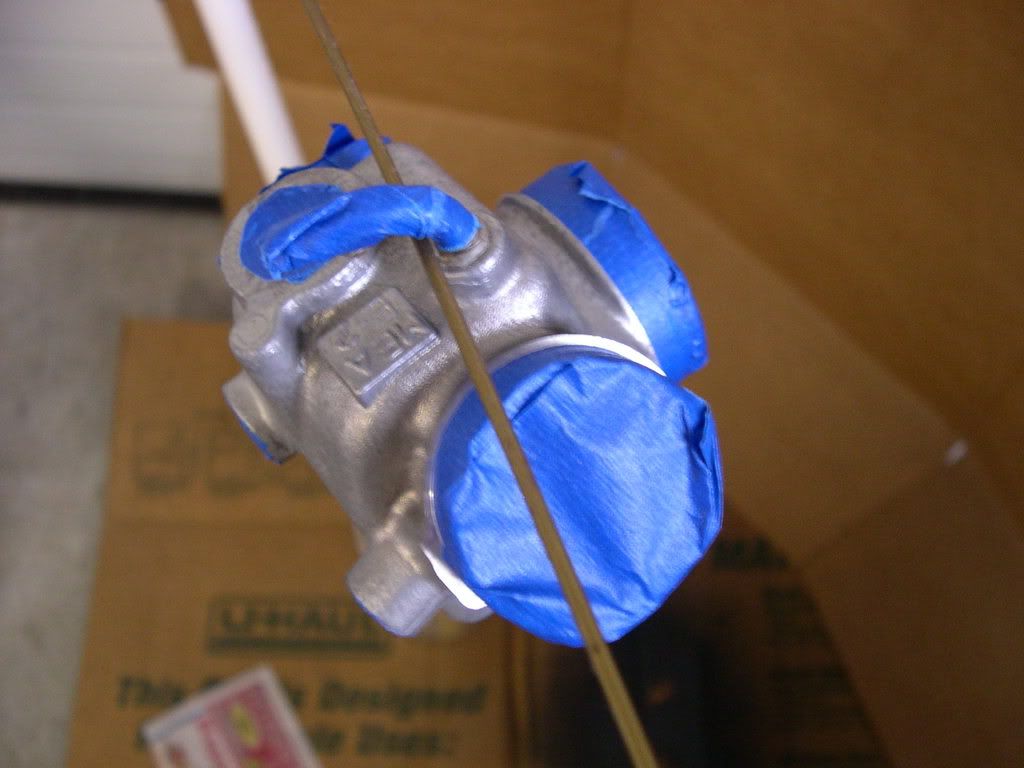
Since I'm a perfectionist, I also touched up the areas around the manifold ports and spark plugs.


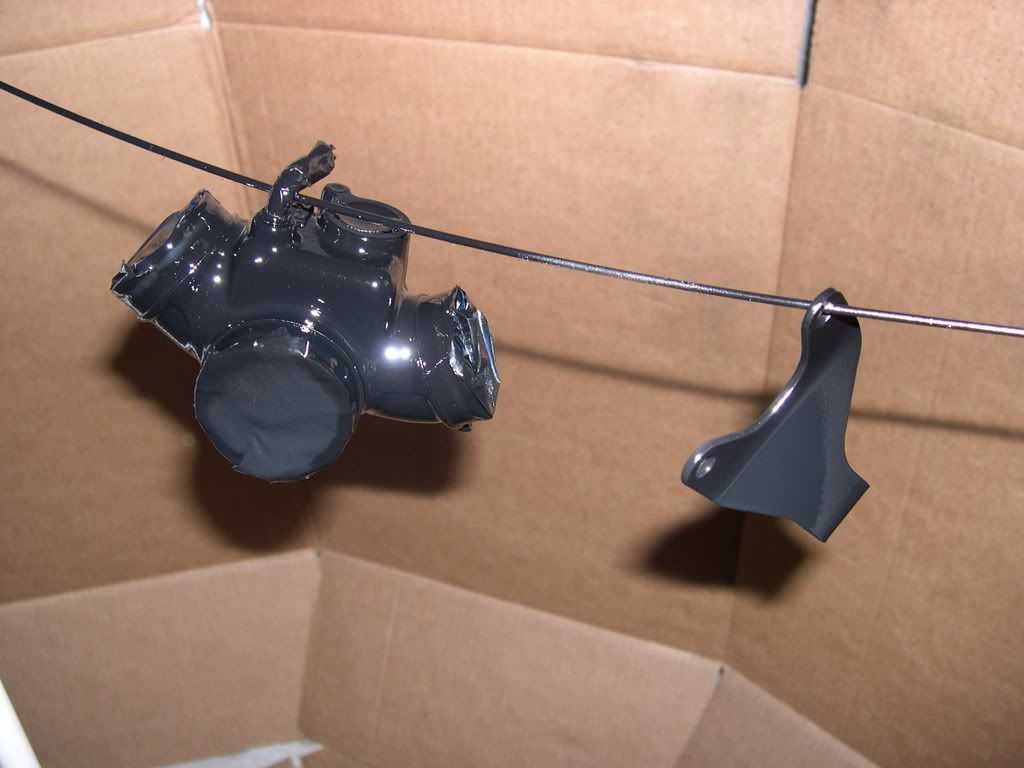
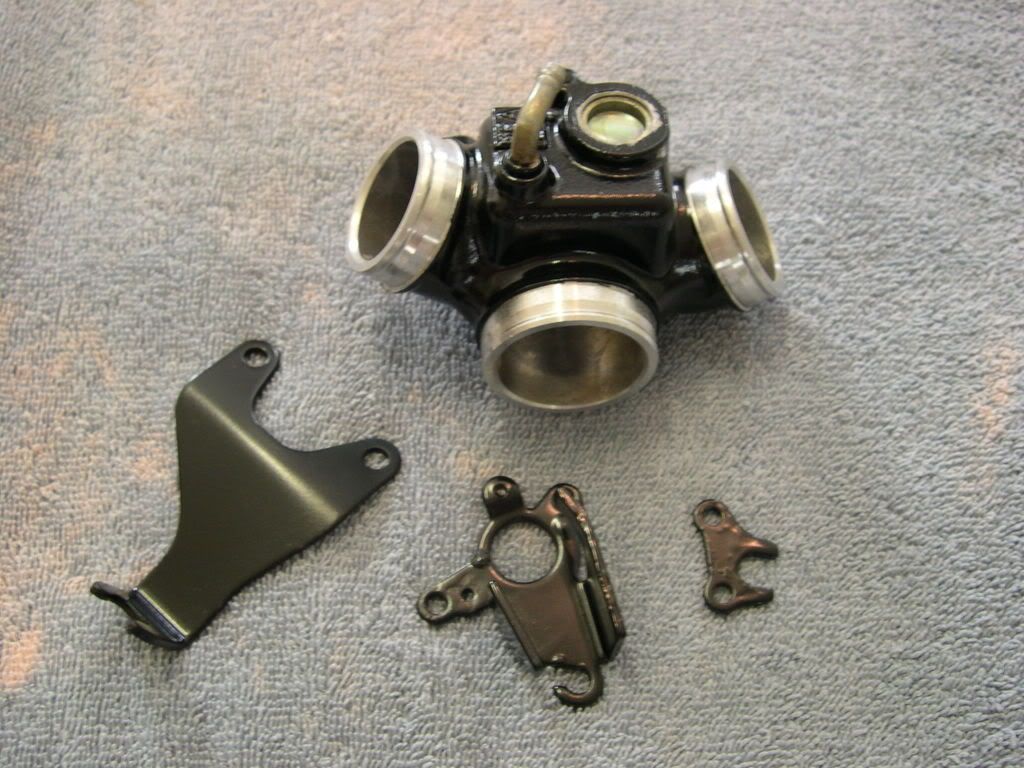
And the carb, manifold & other brackets completed!! Ahh, the evil of it all!  >:D


** Update **

I painted a few more parts and then got everything buttoned up today. She fired up and idled just fine after a tweak on the idle knob. I'll get better pictures when she's out in the sun!

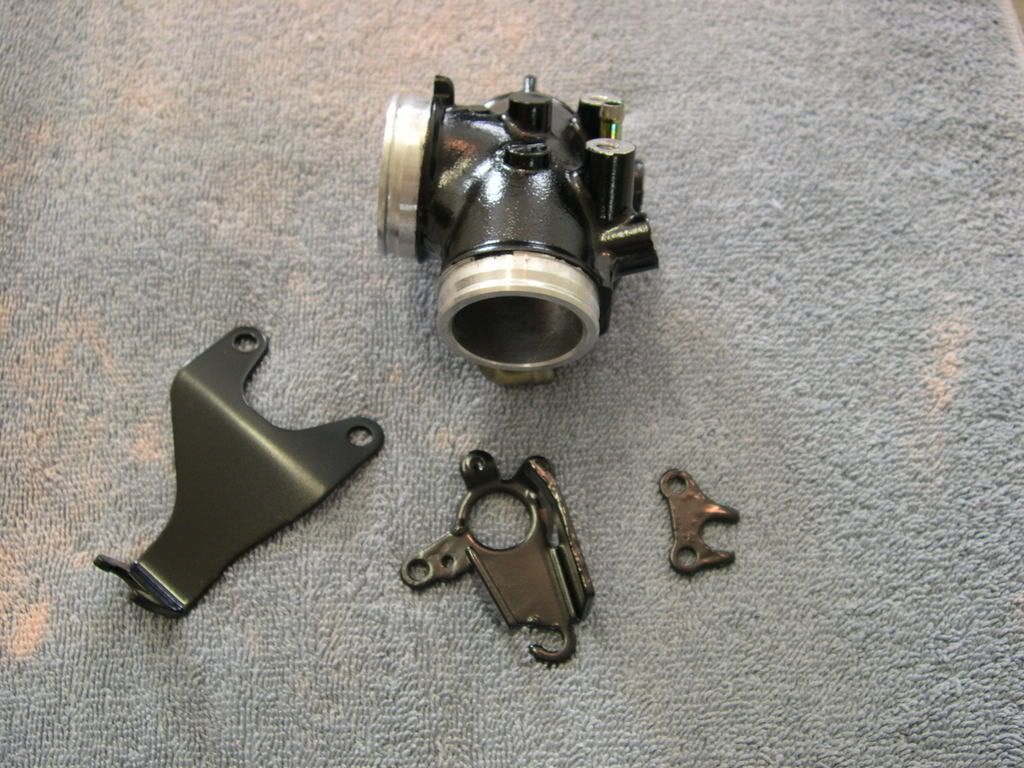
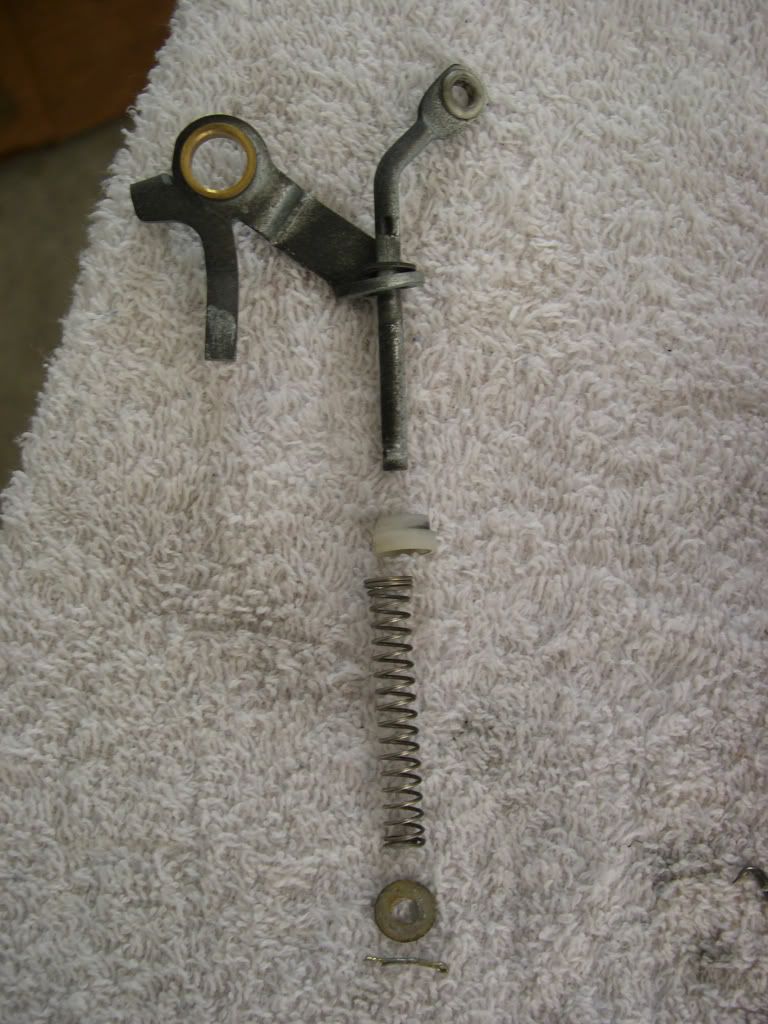
This is the accelerator pump link I took apart to paint.


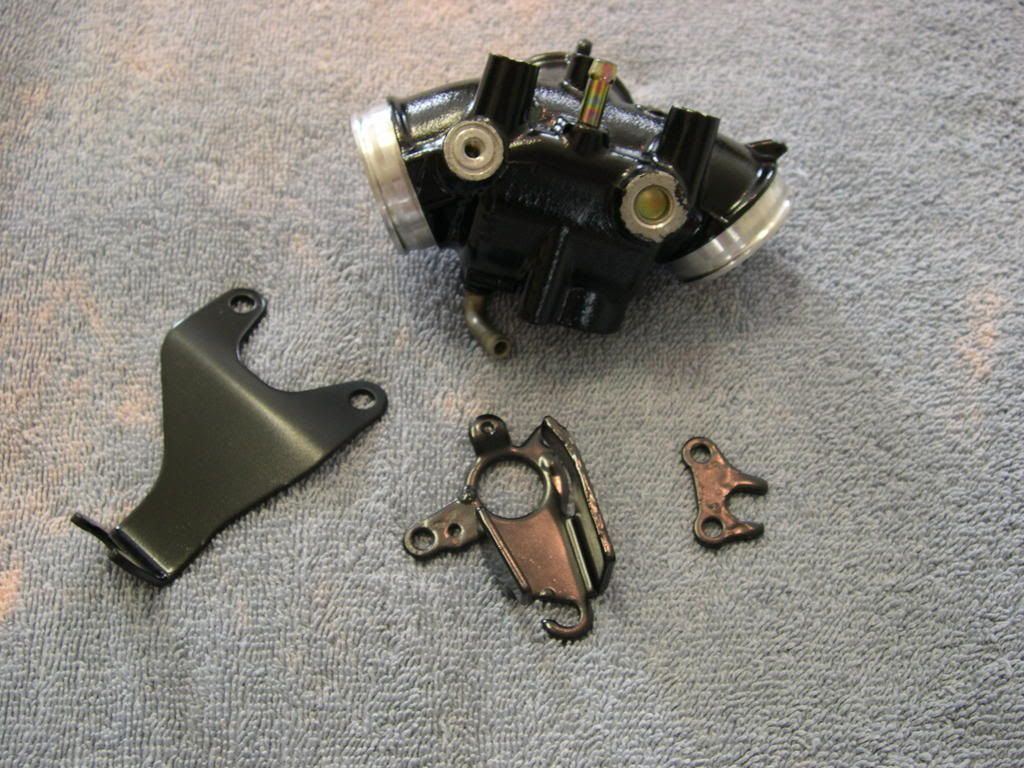
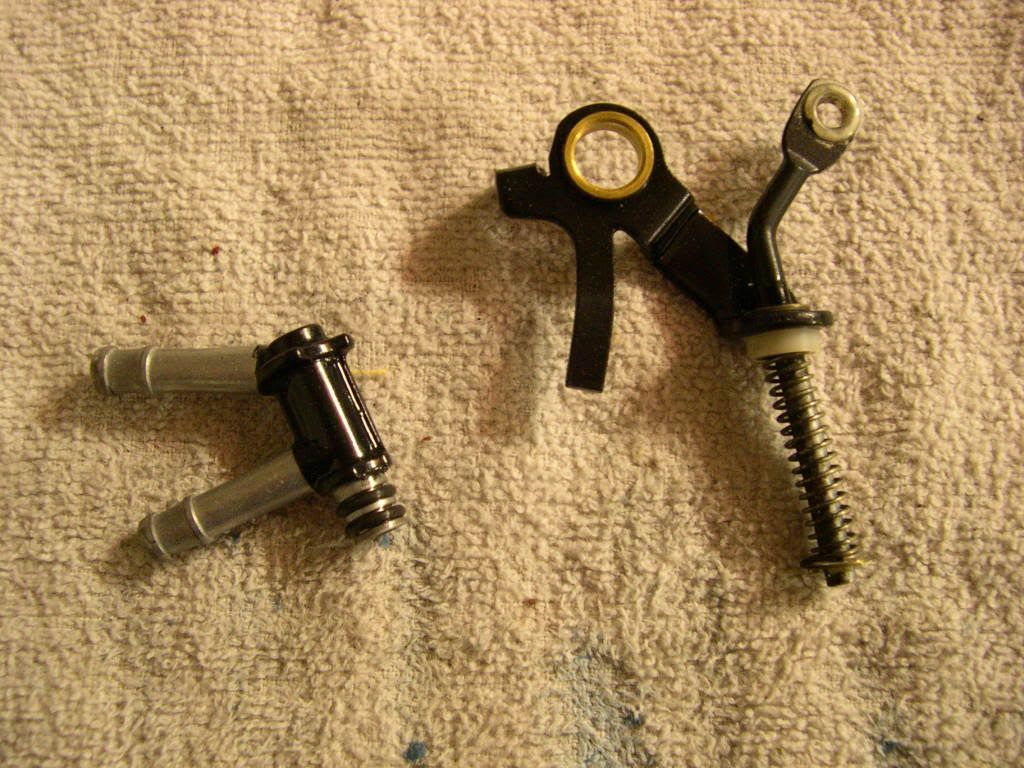
This is the accelerator pump link, carburetor heater and clutch cable stay painted.


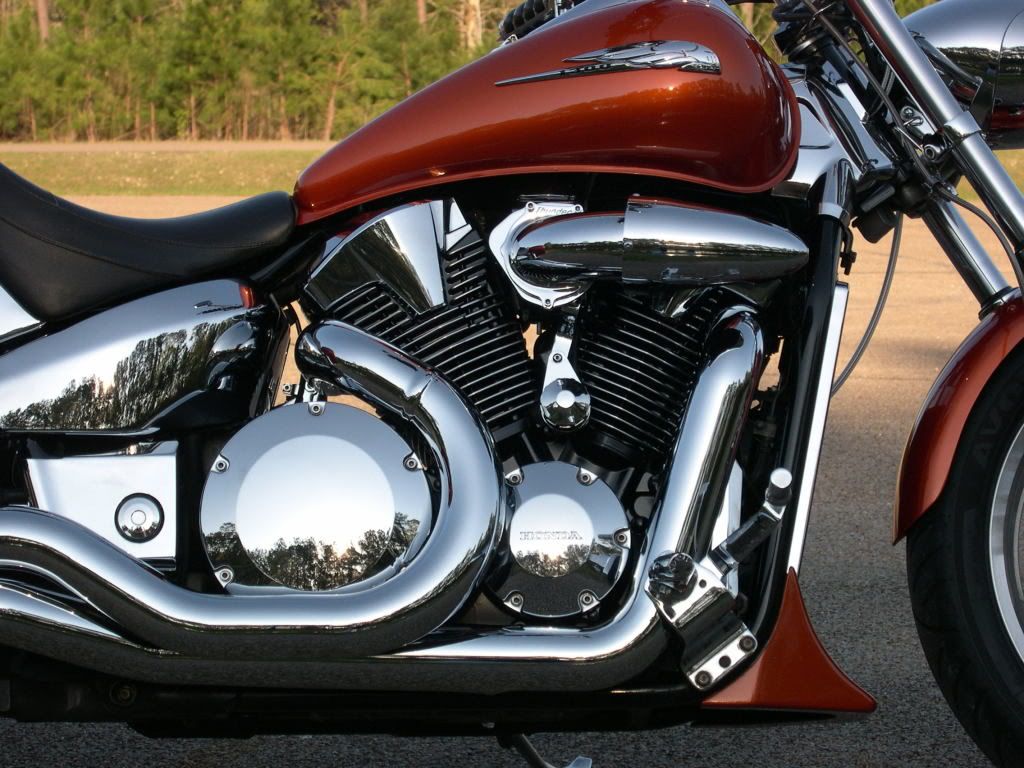
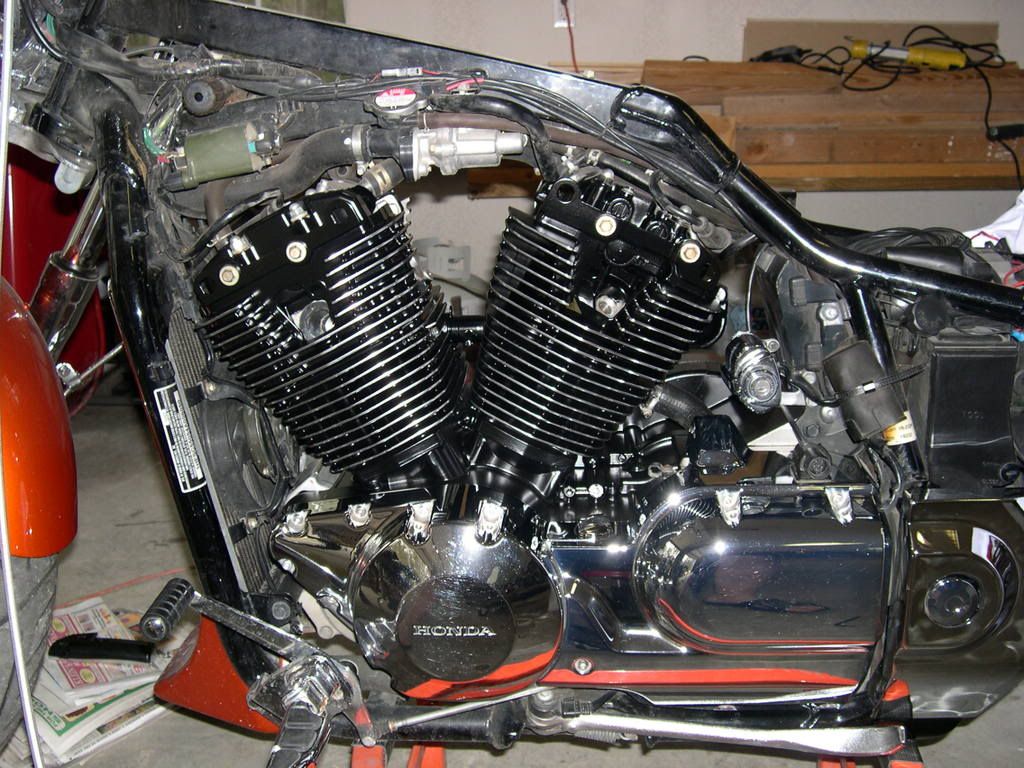
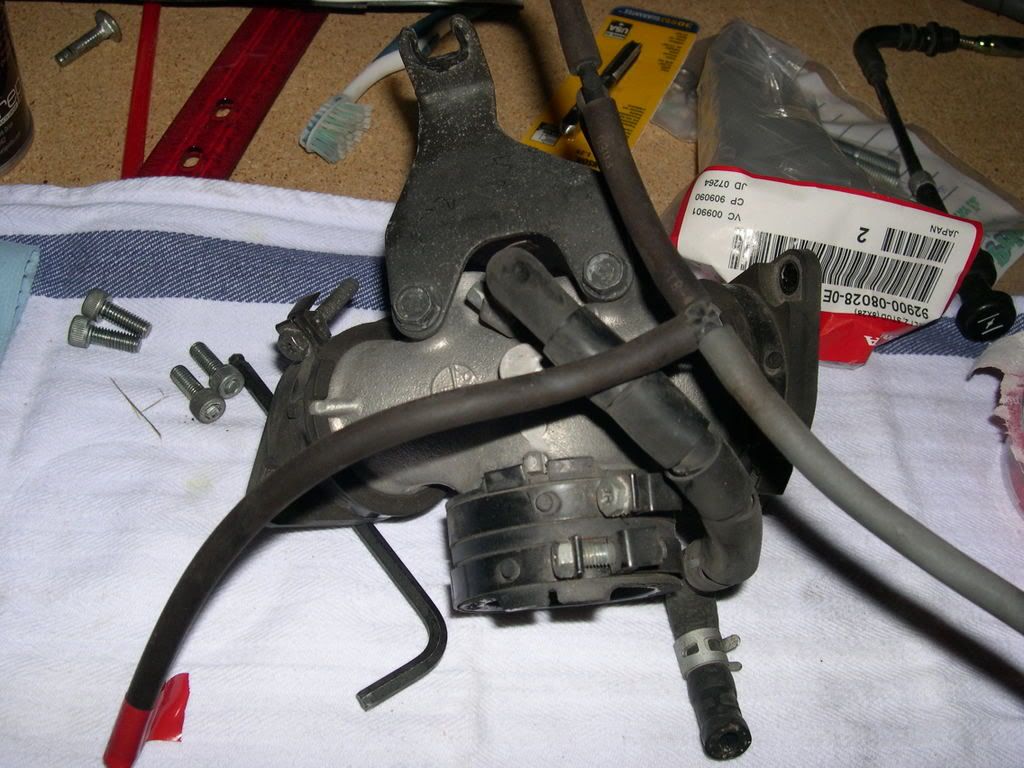
Manifold reinstalled.


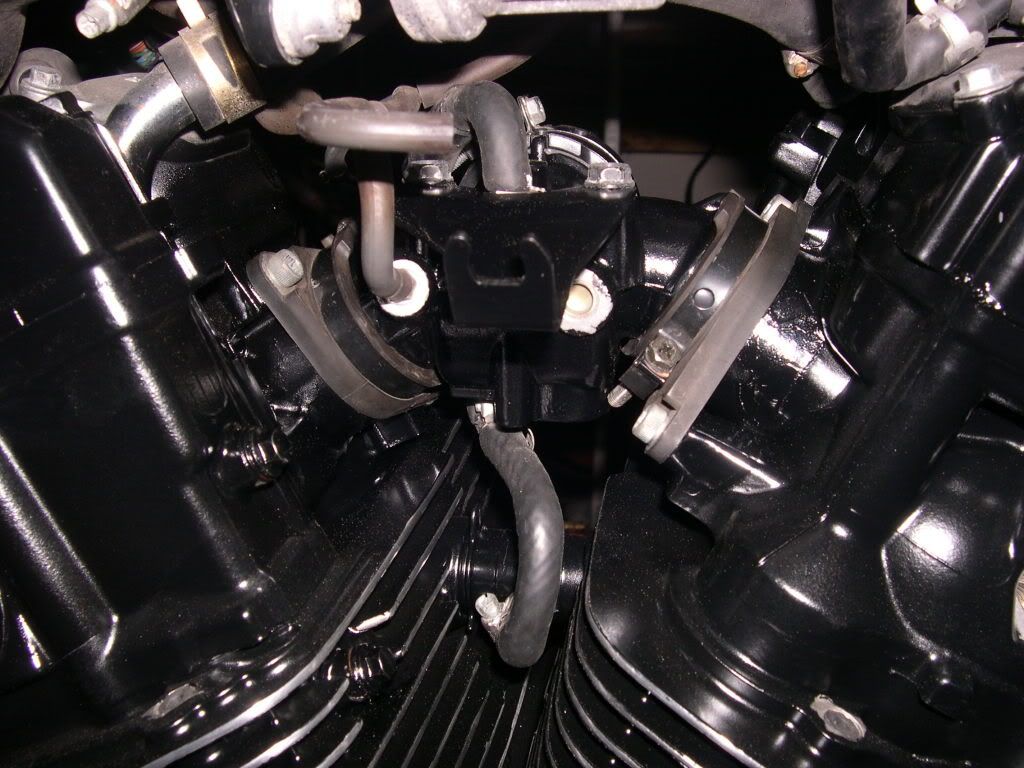
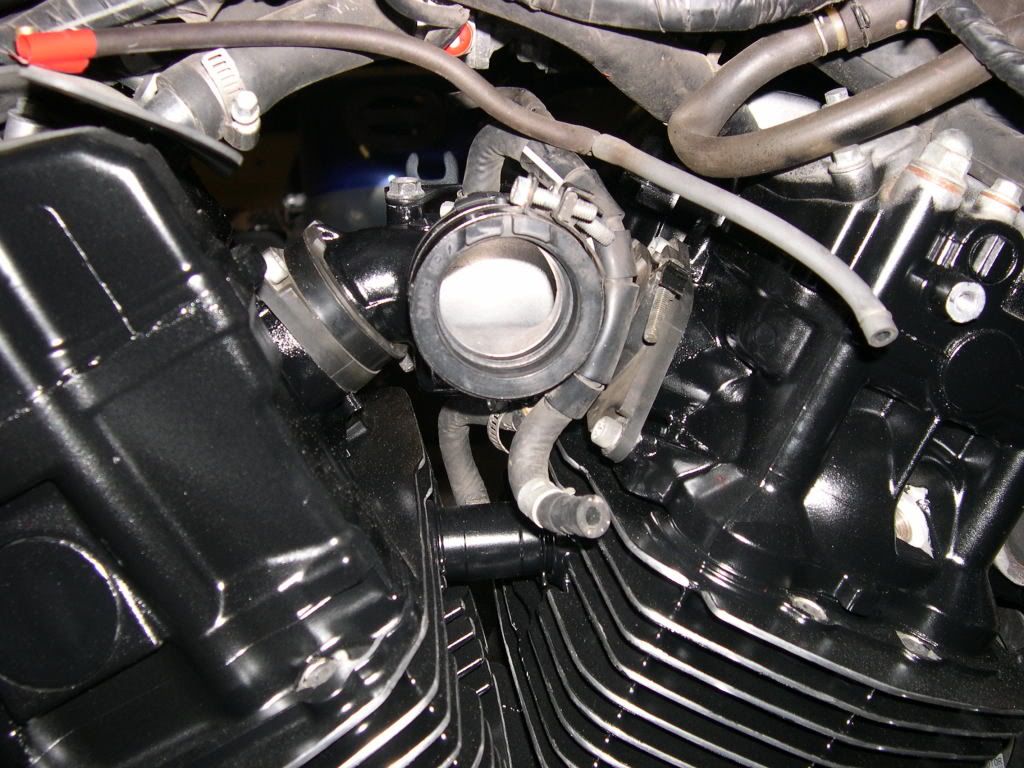
Carb back on, along with everything else.


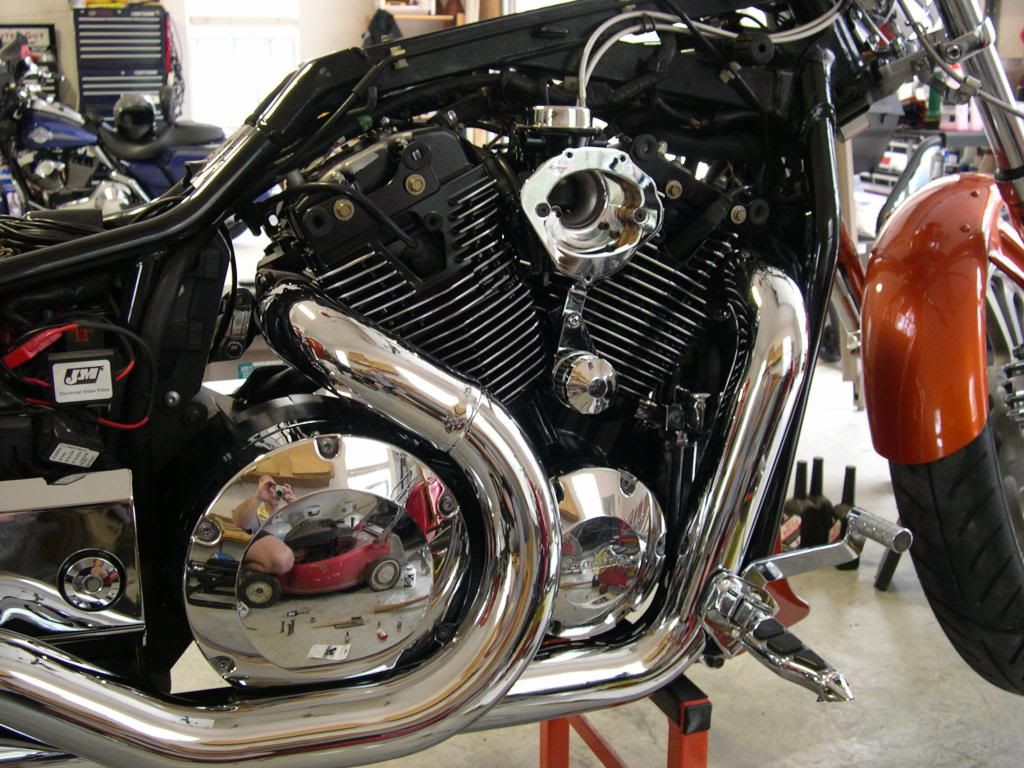
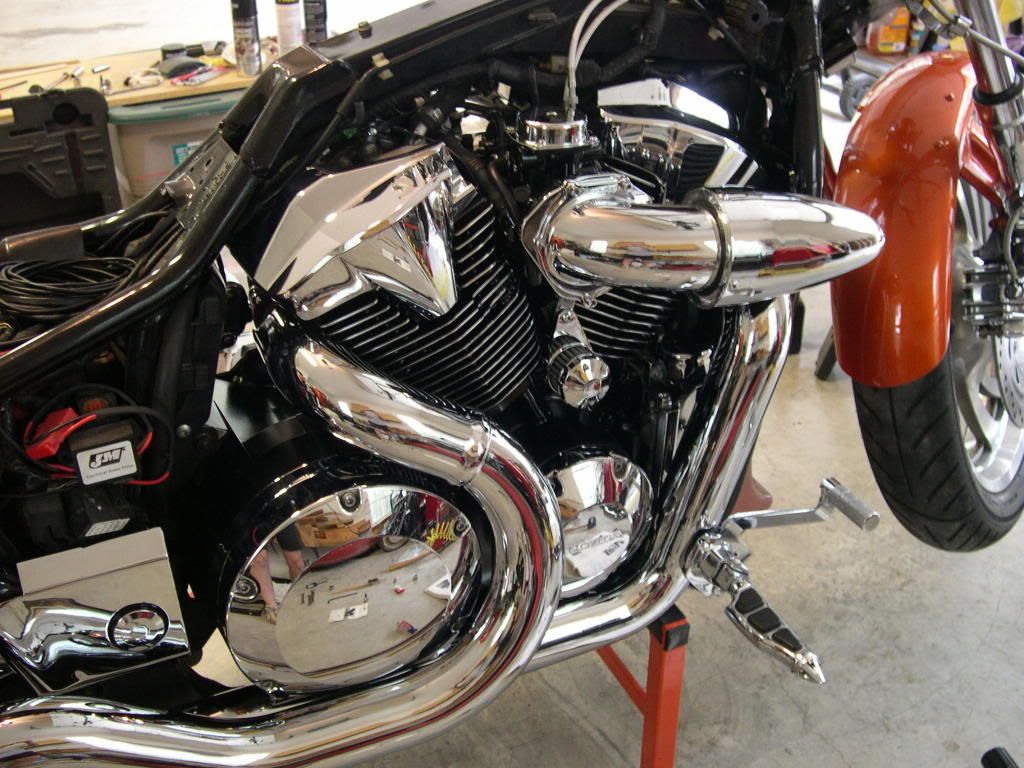
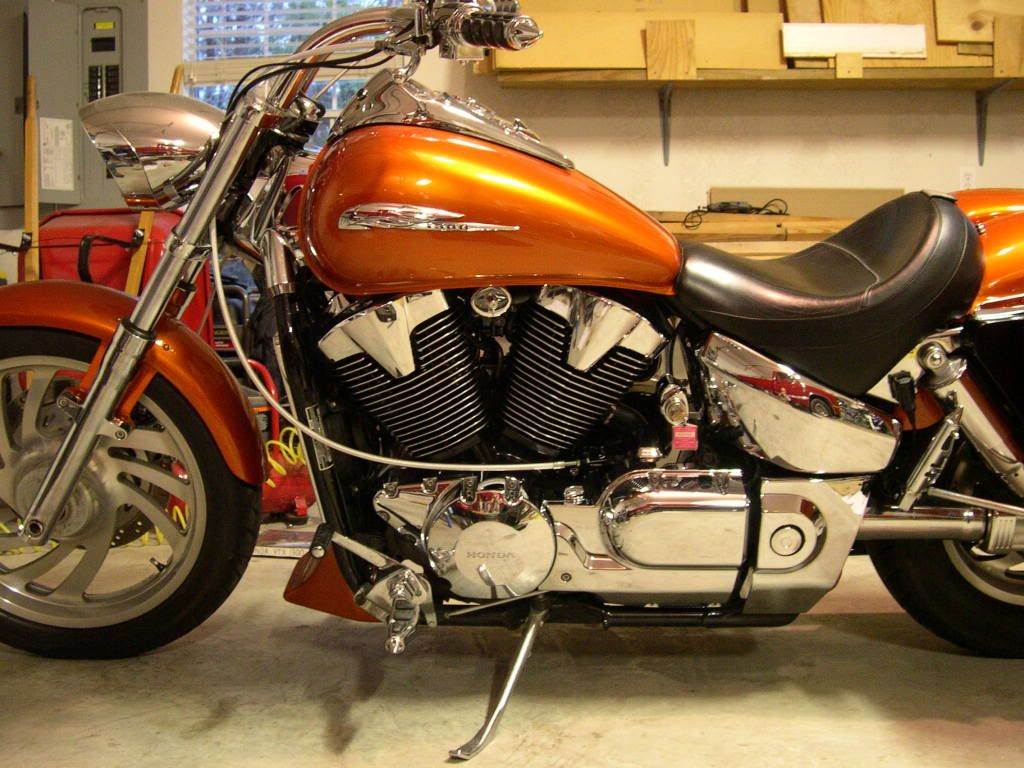
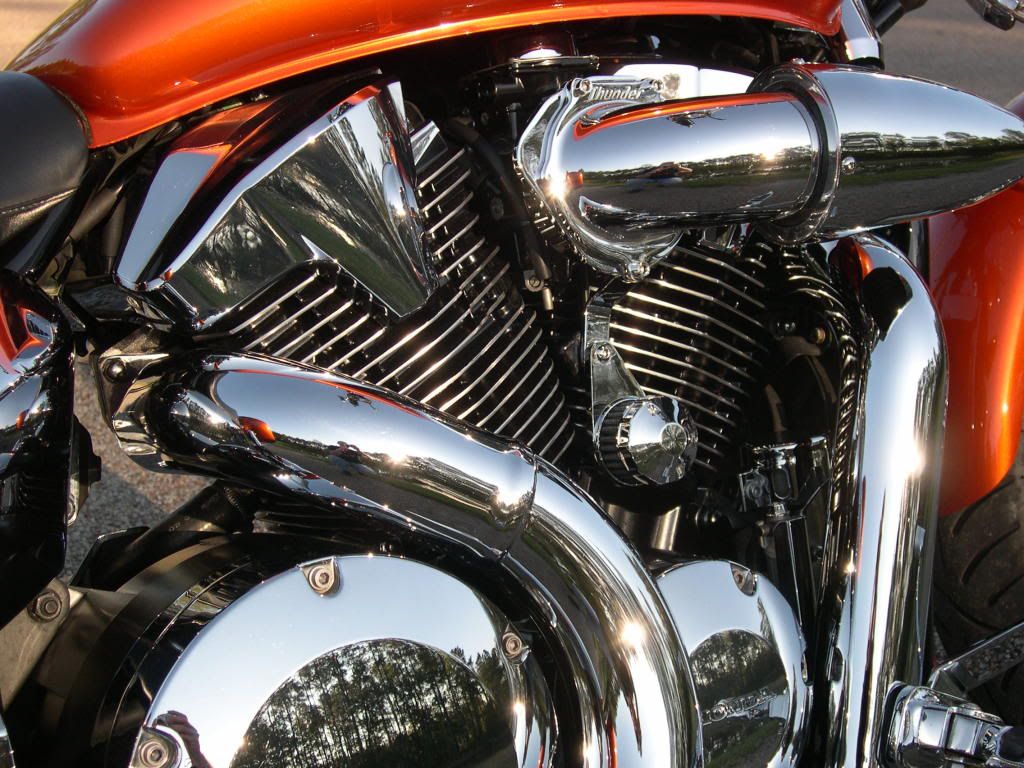
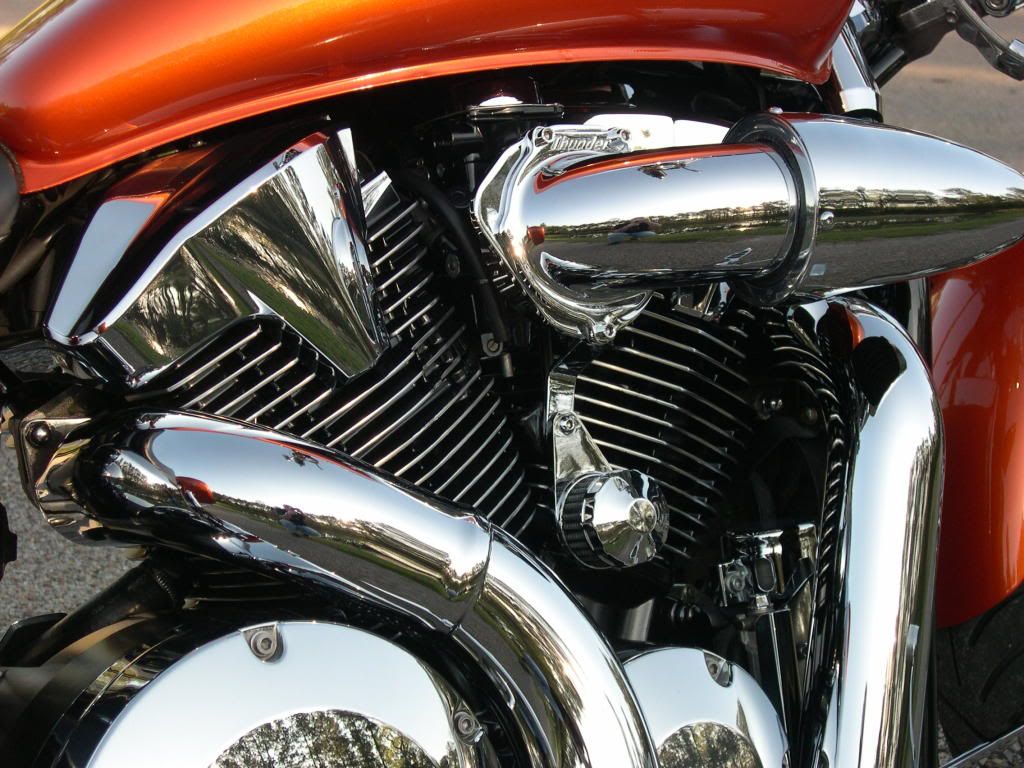
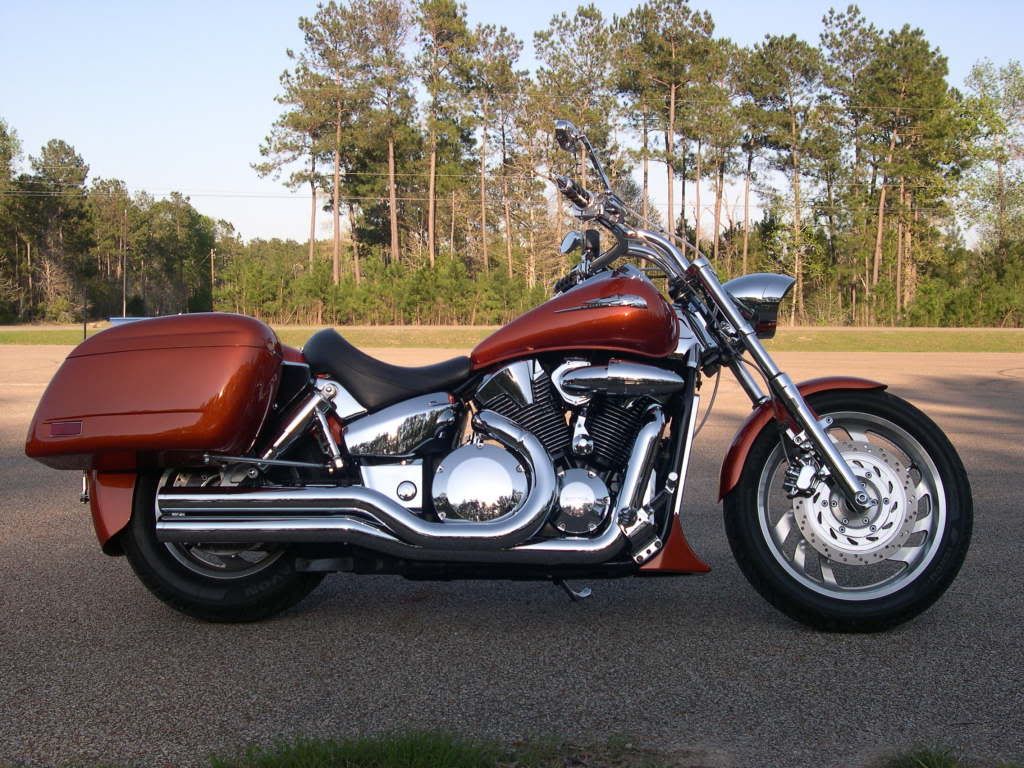
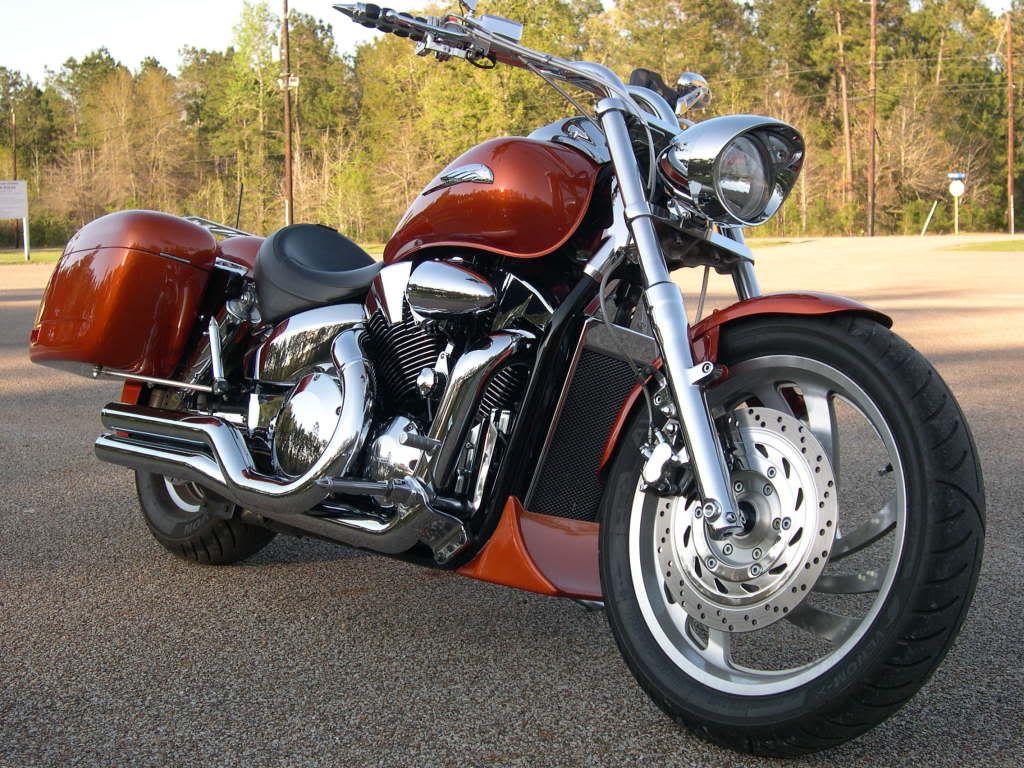
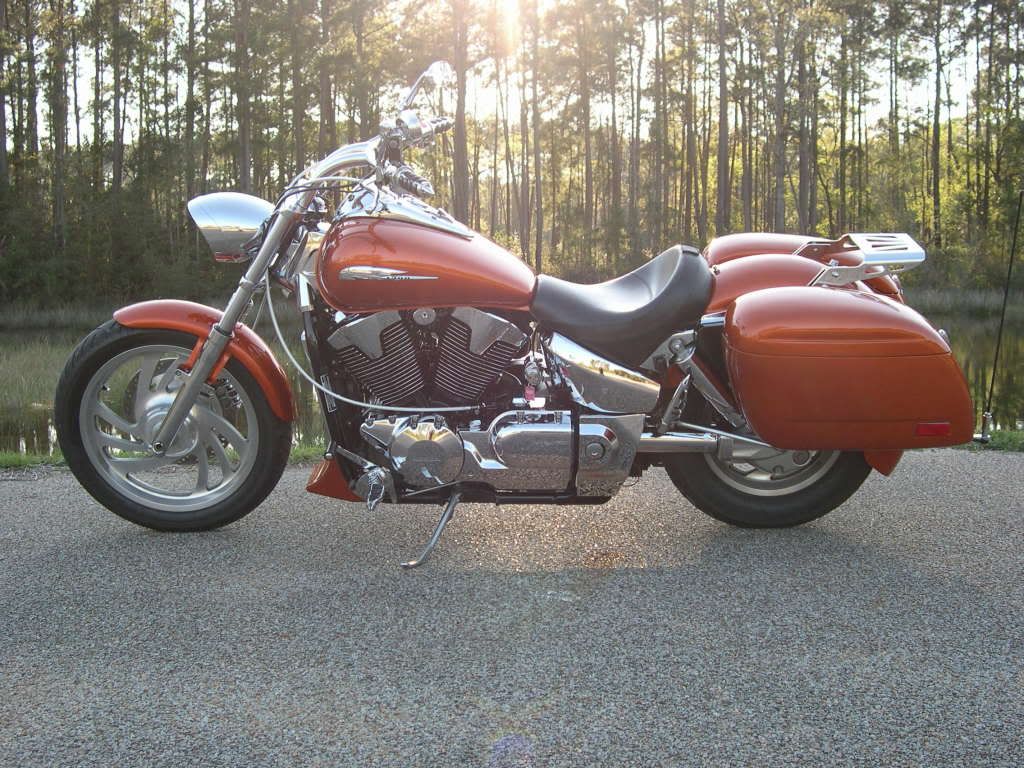
Finally out in the sun (and shade) today...it's been about a month since I've been on the bike...it felt good!!  ;D ;D


« Last Edit: March 16, 2009, 11:29:52 PM by MRVTX »
Logged

Demon

  • Guest
Re: Painting Engine 101
« Reply #1 on: March 04, 2009, 12:19:31 PM »

I want to paint the engine on my bike silver, can you help me? 
Logged

MRVTX

  • Texas X Rider OverLord
  • ******
  • Posts: 3111
  • Magnolia, TX
    • What I do...
Re: Painting Engine 101
« Reply #2 on: March 04, 2009, 12:22:21 PM »

I want to paint the engine on my bike silver, can you help me? 

We could've just swapped engines...


...NOT!!!  :t  Just admit it...you want your VTX back!  :laugh:
Logged

j1mmyj4m

  • The Shocker
  • Administrator
  • Master of Monumental Proportions
  • ***********
  • Posts: 4254
  • Deer Park, Tx
Re: Painting Engine 101
« Reply #3 on: March 04, 2009, 12:39:41 PM »

Very very nice.  That looks alot more tedious that I have patience for.
Logged
Chunk the llama.

dkjsr49

  • Old Timer
  • ****
  • Posts: 232
Re: Painting Engine 101
« Reply #4 on: March 04, 2009, 12:41:04 PM »

Nice Job :thumbup:
How much time did you have in this?
Logged

Gumbo

  • Board
  • Elvis
  • ******
  • Posts: 7980
  • 06 1800R
Re: Painting Engine 101
« Reply #5 on: March 04, 2009, 12:45:17 PM »

Thanks for the pics --- Great Job  :thumbup: :thumbup: Very detailed  :o
Logged
\"The moment you taste it, something wet and dark leaps on you and starts humping you like a swamp dog in heat, and the only way to get it off you is to eat it off, It\'s Gumbo!! If you don\'t eat it then the mystery beast will go right on humping you.

Lone_Wolfe

  • Master Tejano Rider
  • *****
  • Posts: 838
  • Seattle, WA
    • My Cycle Travels
Re: Painting Engine 101
« Reply #6 on: March 04, 2009, 12:53:41 PM »

I think I can see up your shorts!?  :ohwow:
Logged

RocknRoll

  • Texas X Rider OverLord
  • ******
  • Posts: 1636
  • Kingwood, TX
Re: Painting Engine 101
« Reply #7 on: March 04, 2009, 12:57:38 PM »

Jason - that is spectacular.  Excellent.

What kind of speed are you on?  Did it keep you up enough to paint your house again? :stickpoke:
Logged
Wanna make God laugh?  -  Tell him your plans!

Wanna make God angry?  -  Treat Him with indifference!

MRVTX

  • Texas X Rider OverLord
  • ******
  • Posts: 3111
  • Magnolia, TX
    • What I do...
Re: Painting Engine 101
« Reply #8 on: March 04, 2009, 12:59:02 PM »

I think I can see up your shorts!?  :ohwow:


Robert, you're supposed to be looking at the bike's engine...not mine!!!  :ohwow:
Logged

MRVTX

  • Texas X Rider OverLord
  • ******
  • Posts: 3111
  • Magnolia, TX
    • What I do...
Re: Painting Engine 101
« Reply #9 on: March 04, 2009, 01:06:15 PM »

Actually, speed might have helped get it done quicker, but the results probably would've suffered!  :laugh:  I honestly don't know how much time I have in this project, because I took several breaks along the way.  The first day I started with the shrouds, and I believe that was the day I knew I was in trouble and had passed the point of no return.  :laugh:  Also, that was the day I just about permanently wore off my fingerprints.  ;D  I took a day off just from that experience.  All-in-all, I would say that it was somewhere in the 20-30 hour range...seriously.  There are many variations to painting the engine that many have done...some have just painted the entire engine without doing anything to the fins.  That would've cut a considerable amount of time off the project.

It was time well-spent, though, as I was getting to know her better!  :thumbup:
Logged

RSWhite

  • Old Timer
  • ****
  • Posts: 240
  • Frisco Tx
Re: Painting Engine 101
« Reply #10 on: March 04, 2009, 01:17:39 PM »

You have infinitely more patience than I do...   :notworthy: :notworthy:

Very nice outcome !!
 :congrats:
RW
Logged

2004 1800 Retro Spoke, Spec3, Black/Cherry
"Protect the ones you love...  wear a helmet"

MRVTX

  • Texas X Rider OverLord
  • ******
  • Posts: 3111
  • Magnolia, TX
    • What I do...
Re: Painting Engine 101
« Reply #11 on: March 04, 2009, 01:40:56 PM »

I appreciate the compliments!  I certainly wouldn't have done this one "cold turkey".  There are many people on the VTXOA board who have done this to the engine, so I just researched and used what others had done (with my own spin on some details), and then just documented it with greater detail to help others!  I knew what it would look like in the end, and that's why I chose to do it.  It completely changes the look of the boring engine area.

I'm seriously thinking about painting the manifold and carb, too, because with the Tornado air intake, both of those are exposed quite a bit...and I don't think I could stand looking at them in their stock form/color!  I will definitely have to make sure that I don't get any paint where it's not supposed to be!  :ohwow:
Logged

wwaggett

  • Texas X Rider OverLord
  • ******
  • Posts: 2674
  • Clear Lake, Texas Always busy doing nothing at all
Re: Painting Engine 101
« Reply #12 on: March 04, 2009, 01:49:15 PM »

Jason - that is spectacular.  Excellent.

What kind of speed are you on?  Did it keep you up enough to paint your house again? :stickpoke:

Must have been the paint fumes. Very nice work indeed.  :congrats:
Logged

Chad

  • Board
  • Elvis
  • ******
  • Posts: 5971
  • M G, TX.
Re: Painting Engine 101
« Reply #13 on: March 04, 2009, 01:55:48 PM »

Good looking job you did!!  :thumbup: :thumbup: Can you do mine next??  ;D
Logged
Member since 2004
RIP Torque Dec.18,1975-Apr.29,2009

Lucky

  • Board
  • Elvis
  • ******
  • Posts: 5285
  • Canyon Lake, TX
    • Facebook
Re: Painting Engine 101
« Reply #14 on: March 04, 2009, 01:57:42 PM »

Just to reiterate what others have expressed, WOW that is very nice.
Logged
"Lucky" Connie
'06 Pearl Dark Blue 1300C
If you don't love what you're doing, then don't do it.
Your chances of success are directly proportional to the degree of pleasure you derive from what you do.
Pages: [1] 2 3 ... 5


SimplePortal 2.3.3 © 2008-2010, SimplePortal